
Depending on your point of view, I’ve either been lucky enough to travel and live in a lot of different places, or I’ve had to deal with the inconvenience of moving — a lot! Since I’ve always been involved with some form of media — be it music or video — I’ve had my share of setups that have grown with my experience. These setups moved with me and evolved to suit my needs. It’s obvious why I’ve had to construct countless practice spaces, impromptu sound stages, outdoor events, recording rooms, project mixing spaces and finally a recording studio. If I’ve learned anything along the way, it has been how to get a room sound that works.
The approach is twofold. On one hand, chasing the perfect room response is akin to looking for unicorns. There’s a reason that professional studios and rooms cost a small fortune to design and build. The converse is to take what you have and make it work for you. An audio engineer’s biggest advantage is possessing and understanding a consistent environment. You can achieve some fantastic results when working in a room that you understand and have experience with.
…chasing the perfect room response is akin to looking for unicorns.
Advertisement
Your immediate goals are to find a good listening position and to minimize the amount of reflections in and around it. This is where we start to explore the ins and outs of treating your space and taming its character.
The Space
Things to look out for here are parallel walls and ceilings, corners, and reflective surfaces like windows. Parallel surfaces cause frequencies to reinforce and build up on themselves and can exacerbate a problematic frequency range. Right angle corners tend to cause bass loading by trapping low frequencies. Windows are very good at reflecting high frequencies and will contribute to a room having a harsh tone.
Parallel surfaces can be combatted by making them less even through the use of absorbent panels and diffusers. In a perfect world, the walls and floors would have been designed to not be parallel. Corners can be cut or reduced by using panels or heavy foam pillars in order to reduce the angle of the corner and also make it more absorbent. Windows can be covered with panels, or you can use heavy curtains or fabrics in front of them.
The Auralex Sono Columns work amazingly well in corners and drastically reduce bass loading.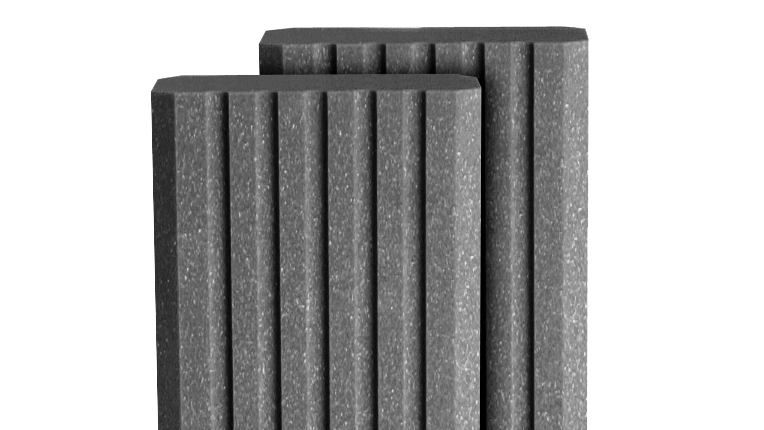
Coefficients
When sound is emitted, it interacts with the environment in three ways: reflection, absorption and transmission. It should come as no surprise then that materials are rated with Absorption Coefficients and Noise Reduction Coefficients. Whether these ratings are published is a separate story, but there are plenty of general specification sheets out there to give you an idea. Both operate on a scale of 0 to 1. A reputable manufacturer will tend to supply these values with their product specifications.
Low Versus High Frequencies
There are several key differences between these two frequency ranges that will dictate your approach. Low frequencies are non-directional while mid and high frequencies are. This is due to their energies. Low frequencies are high in energy, which explains their ability to easily carry through surfaces and over distances. High frequencies are much lower in energy and tend to dissipate fairly quickly by being more easily absorbed by materials.
The only real way of dealing with low frequencies is through mass, which means the physical size and density of a wall or surface. Meanwhile high frequencies can be dealt with by using diffusers and fabrics. Even an ordinary curtain in front of a window will have a positive effect on reducing high frequency reflections.
Acoustic Panels and Materials
Treating involves intelligent use, plus trial and error, to tune the room using materials with the right characteristic to reduce and alter the room’s response at certain frequencies.
When it comes to acoustic treatment brand names, Auralex is probably one of the best known. While rightfully renowned, it’s also a very good way to break the bank. If anything, try to keep an eye on any deals you can find on used panels, clearance sales, etc.
There are several types of designs that use foam, metal, fiberglass, and wood. Each design has a specific shape and function designed to work in different locations and at different frequencies.
The reason behind acoustic foam is that it comes in several different densities and is of an open cell variety. These little air pockets help trap sound as it passes through the material. Air just happens to be a great insulator.
And remember, egg cartons don’t work!
Using Everyday Items
Blankets and egg cartons seem to be natural first answers when thinking about sound treatment. There is one major difference between the two in that one works and the other does nothing whatsoever. We hate to be the ones to say it, but egg cartons don’t really do much besides bear a resemblance to some styles of diffuser panels.
One of these is not like the other.
Blankets on the other hand are, forgive the pun, a bit of a blanket term. We have our run of the mill comforters, fuzzy, woolly, and synthetic material blankets. None of which have the same NR coefficient. For our uses, we will opt for the thickest fuzzy and woolly varieties. These will have some mass to them and can also cover a sizable area.
Good uses for these blankets can to reduce mid and high frequency reflections from flat surfaces like walls and windows. Surrounding makeshift vocal booths to reduce ambient sound entering the microphone also works pretty well, producing a nice and dead recording.
The downside to blankets is that there isn’t much fine tuning and you might end up taking out too much of a certain frequency range.
Carpet, depending on the size and thickness, has been known to be used on floors and walls. On floors, a heavy carpet can be effective at taking out mechanical noise from transferring into and through the floor — this can be sound coming from your speakers or noise coming from below — and generally reducing the reflectivity of your floor. Usage on walls has generally been reserved for garageband situations.
You can salvage other found items like closet doors to create makeshift sound booths by taking the two doors and mounting them at right angles to each other using acoustic foam on the interior sides. This will create makeshift solution you can use to reduce ambient sounds entering your microphone.
DIY Broadband Frequency Absorbers (AKA Bass Traps)
This is probably one of the best approaches to treating and deadening a room. While it will require an investment, the results will be on par with some commercial level products that retail at much higher prices, be aesthetically pleasing, and most important, produce a controlled result.
Your biggest budget considerations will be dictated by the size of your space, the number of panels you require and the subsequent cost of materials.
The most common design makes use of rigid fiberglass insulation mounted on a wooden frame and wrapped in fabric. The magic bullet in this design is the Owens Corning 703 rigid fiberglass panel. We highly recommend using the panels with a 4” thickness. Mounting can be done with i-hooks, painting frame mounts, or in our case, a cable system. We went this route because we wanted to avoid directly anchoring them to the wall. Depending on the quantity, you can look for these panels online, or you can find a local supplier if you are buying in bulk.
You’ll find that this design has a fantastic ability to significantly reduce the level of frequencies from 125Hz to 4KHz. A large enough panel will significantly alter the characteristic of any room in order to reduce not only reflections but issues stemming from the loading of lower frequencies.
These absorbers will not completely block out sound or stop low frequencies dead in their tracks. There is a large aspect of acoustic design and treatment that can only be remedied with some form of construction.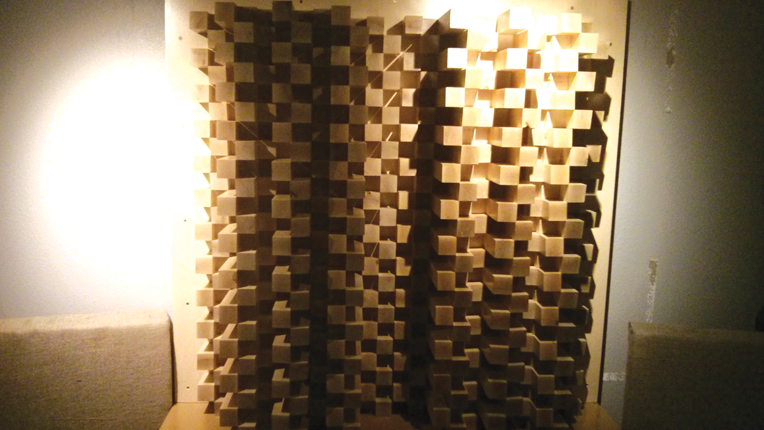
Case Study
When setting up any room the first thing you should do is set a goal. Be realistic. What is it you are trying to accomplish?
When setting up the room here, there was one simple goal, which was to remove reflections from the listening position. Taking into account that the majority of the reflections were 4 KHz and above, we did not need to employ any significant mass loading. Instead, we opted for 24 wedge foam tiles coming out to less than $60. Each is a square tile measuring at 15 inches per side.
These tiles can be mounted with adhesive. We opted for a less destructive approach by using flat thumbtacks and cutting small spaces between the foam so that the base can sit flush with the foam. This helps to reduce the visibility of the thumbtacks.
Ideally you’ll be able to take a more scientific approach to this by analyzing your room’s frequency response, but you can also get some good results by using your hearing and a bit of audio theory.
The final layout used four panels mounted on the ceiling above me and the speakers. Two more panels are mounted on the rear wall behind each speaker. Further up the wall, there is one panel on each the left and right directly above that helps cut down on the corner. Once the sound was being diffused and channeled away from the listening position, I needed to make sure that it didn’t reflect back to the source. This was done by another array of five panels on the wall directly behind me starting at head height and moving upwards.
In a previous article, we spoke about matching your equipment to your mixing environment. In this case, we don’t have a huge space to work with. To match it, we didn’t put a large pair of monitors in. Eight-inch drivers would hardly help and would only cause bass loading. We went ahead with four and a half inch drivers and have not regretted the choice.
The rear wall of my room.
The ceiling above my listening position.
My listening position.
Summary
In the end, you should do what’s right for your situation. We wouldn’t be in this profession if we weren’t accustomed to spending money. The real trick is to spend money on the right items. I think the purchase of 24 diffuser panels is a good start since they get a lot done for a fairly small investment. The same can be said for the bass traps. You might spend a couple of hundred dollars, but you will get a return that is worth a lot more if you went the prebuilt commercial route.
Your starting point should always be to take stock of what your space does and does not have. Running a frequency response test on your room never hurts. Even walking around and clapping your hands and testing for slapback echoes is better than nothing — we’re not kidding. Improvements are hard to miss. For example my listening position is now a pretty serene spot where I can feel a noticeable stillness in the air.
The most important thing is that you are happy with the results and that you had fun doing it.
Blag has a B.A. in Recording Arts from California State University Chico. He is a sound engineer and web developer with a love for music, video, and is always finding something to nerd out on.


