
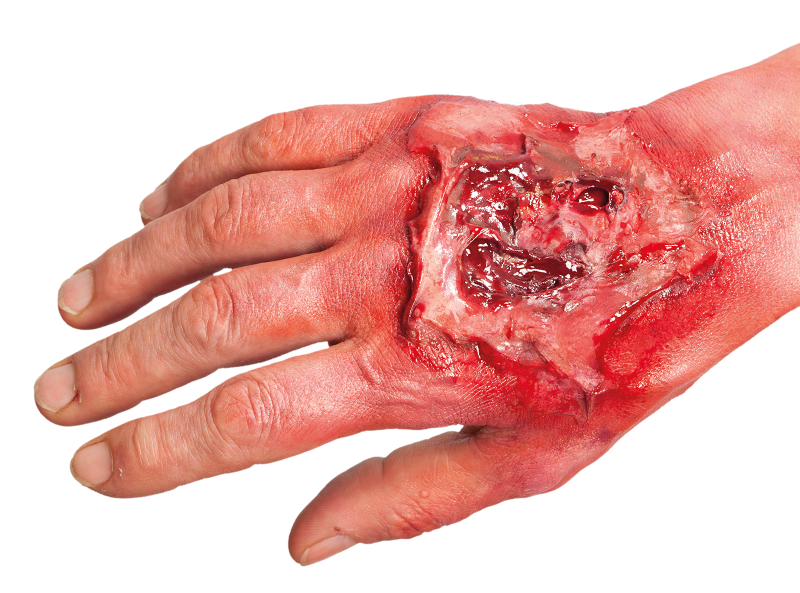
You can dress up in the most extravagant costume, and paint the most intense makeup over your entire body, but nothing screams different louder than physically altering your bodily structure. You’re not a beast until you have an extended forehead. You’re not a demon until you have horns. You’re not a mutant unless you have those little spikey things in a pattern down your back. In the entertainment industry, these are accomplished with what is known as special effects prosthetics.
Such radical changes should not be taken lightly. A good actor and director know how to make a successful monster without altering appearance. Rather, prosthetics are best used for impact or to represent deviation from the norm or a change that has taken place. Like any other prop, they should accentuate the character and help explain its personality, not stand in for it.
A basic understanding of materials and concepts is all thatÃÂs needed to get started in making your own imagined creatures come to life.
Good prosthetics will still allow for emotion to show through and will remain solid and consistent throughout the performance. The most basic of applications can be used to simply hide effects mechanisms, like blood tubes and incoming bullet hits. The most complex will render the actor completely unrecognizable as a human. Regardless of level, the best appliances will help tell the story of the character in such a way that the viewer will understand the character by simply looking at them. Such an effect doesn’t come easily though. Prosthetics are tough to master. People work for years to perfect the art, and many never achieve a level they are truly happy with. That said, getting started is actually easier than you think.
There are three types of appliances. Premade, which are preformed shapes that come ready-to-apply right out of the package. Alternatively you can make your own, for more customization and variety. However, for a perfect fit, you’ll want to construct your appliances via a lifecast, in which an impression of your model is taken and a truly custom fit appliance is constructed. The appliance you should use depends on the situation in which they will be used and the detail at which they will be presented.
The basic materials

Foam Latex –This mixture expands as it dries to form a tight sponge-like substance that will hold shapes when hardened, yet be flexible enough to allow movement. Foam tubing and Paper Mache can be found locally and can sometimes be used just as effectively.
Silicone – Similar to liquid latex, only with more of a shiny texture and less tackiness when dry. This substance can set quite fast and be tricky to manipulate accurately, even for experienced users.

Spirit gum (Pros-Aide) — Specially formulated glue that is applied to the skin and holds down appliances like nobody’s business. Medical supply stores may have an equivalent medical-use adhesive. This substance is also used to coat prosthetics to remove stickiness or to provide a proper surface on which makeup can be applied.
Modeling clay – An oil-based plasticine clay that can be sculpted into the shapes of your prosthetics. From these negative molds are made, which can then be filled with Latex, silicone or the like to make your final prosthetics. Find it in any local crafts store.
Alginate – A plant-based powder that when mixed with water can be used to safely take impressions of body parts or objects. Thin layers can also be used as a separating agent when making molds. This can sometimes be found in medical supply stores, but most likely you’ll have to have it shipped. Casting gel is a product that is similar to alginate but with slightly different properties found in craft stores.
Gypsum cement – Harder than Plaster of Paris when dry, this substance is too heavy to form an appliance itself and is never used directly on the skin. Rather it is used to form a hard shell for your mold inside which prosthetics can be shaped. The most popular type in the film industry is Ultracal 30. Small batches of hydrocal can rarely be found in art stores and mixtures used for other purposes (though still decent for molds) can be found in home improvement stores.
Plaster bandages – A burlap-like fabric soaked in plaster powder. When wet and applied in conjunction with the gypsum cement, they will dry and harden to form an outer shell around the cast. Likewise it can be applied to alginate without the hydrocal (using cotton or some other stringy material as a joining element) to form a thinner, lighter mold of its own. It can be easily found in medical supply stores, or you can create your own by using actual burlap fabric over the regular plaster.
Separating agent – A slippery sealant (like oil or Vaseline) used to coat the inside of a mold before the latex or silicone is added. If no separating agent is used, the prosthetic will likely fuse to the mold as it hardens, making removal all but impossible.
Makeup removal compound – Makes removal and cleanup easier and less painful for the talent and helps remove prosthetics while minimizing damage. Any makeup supply store should have good removal and cleansing agents.
Application Tips and Pitfalls
Let’s say you have a prosthetic you’d like to apply. How’s it done? Assuming you’ve already laid out your overall design, you’ll need to consider where to place everything, and if there is overlap, which should go on top of the other. Your appliances should generally conform to anatomy, either of a person, or the creature you’re trying to emulate. The less you conform, the less people will be able to understand it. The audience needs recognizable elements in order to define what you’re trying to convey. Unfortunately the human body doesn’t always lend itself to your design. Hair for example, is often a major obstacle to be overcome.
We’ll start with premade appliances. These are the simplest to use, but they offer the least amount of customization. Use these when you don’t have a lot of time to invest, but be aware the “one size fits all” nature of these items can lead to design limitations and ill-fitting applications. Don't be afraid to use premade appliances in ways they are not meant to be used. Let’s say you have a pair of premade horns. Instead of using them on the head, use them as tusks or shoulder spikes instead.
If you do place them on top of the head, you’re going to have to deal with your subject’s thick head of hair. You could ask them to shave it all off, but don’t expect a positive response. In this case we’re going to apply a bald cap over the hair that will also serve as a new foundation for appliances. Flatten the hair as much as possible with a strong hair gel. Place the cap over your subject. Long hair can be flat braided and fed down the back of the cap and tucked inside the wearer’s costume. You may have to shape around the ears, but keep at least a quarter-inch border to cover side burns and hairlines. Mark trim lines with a wax or grease pencil and trim smooth edges. Leave the back as long as possible as you can tuck it inside the wardrobe.
Apply a small line of spirit gum to the inside edge of the mask along the forehead. In most appliances you need only apply the glue to the prosthetic, but since this is the most important seam, and will suffer a good deal of strain, you might want to apply some to both surfaces. This could make removal more difficult though and provides an increased risk of lumps, so minimize this practice as much as possible. When the glue is very tacky, smoothly lay the seam back down onto the skin and hold lightly until it sets. Continue to glue down the sides and around the ears. Stop at the top just as you start to go down the back of the ear.
Have your subject tilt their chin up slightly now and tape or glue down the back of the bald cap to the base of the neck. When they return to a normal posture, the cap should be without tension, yet taught and without wrinkles. At this point, finish gluing down the remaining edges from the top of the ear down the neck. Learning how to avoid bunching, folds and loose edges will mean the difference between a successful appliance and a sad one. Always glue from one location outward. You never want to start at the sides and work to a central point. If you need to glue down directly over thick hair, like eyebrows or sideburns, then be sure to coat them in Vaseline so they don’t pull the hair out upon removal.
A light brushing of spirit gum or latex over the cap will provide a base suitable for makeup and other attachments. You can now glue the horns anywhere on the head or cap. Whenever possible, keep seam lines to shadows and undercuts, or at least away from the direct camera sight. Smooth transition lines as necessary with latex or mortician’s wax using a makeup sponge. You can also hide edges with hair or makeup. Finally, keep in mind the textures of your appliances. Horns shouldn’t flop when the character moves. On the other hand, making them too heavy can make them uncomfortable or fall off. Packing hollow appliances with light foam or even cotton is, in most cases, all that is necessary.
If you’re going to conceal blood tubes, lights, or other effects under your appliances, run them first. Follow the same seam lines and run them to hidden access points under clothing or hair. Be sure not to pinch your tubes when you apply the makeup. Applying makeup effectively is an art all its own and requires as much practice as prosthetics themselves. Stippling with sponges, drawing with brushes and even airbrushing are all techniques to experiment with and develop over time. As a beginner, try your best to follow this rule: blending is important to the overall look and accentuating the transition from light to dark will help define your shapes.
Making your own
To reiterate, the key points of a good prosthetic are smooth and even applications, small and hidden seam lines and well blended concealing makeup that defines the form of the anatomy. Achieving this is a little trickier with premade effects, which are by necessity one size fits all and may not be exactly what you’re looking for. Fabricating your own appliances out of latex, light foam or even Paper Mache allows you to better fit your pieces into the exact places they’re supposed to go and creates the exact structure you desire. Such fabrication is yet another art form and will require a good deal of refinement. In the end though, things may not be perfect enough to allow your talent to emote through the makeup. For this you need to conform even closer to your talent’s anatomy.
For a truly perfect fit, you will need a lifecast. This means you have a perfect “statue” in essence of your subject and can work in fine detail to create pieces that exactly match the application site of your talent on one side, and create the new textures and shapes on the other. This is an advanced technique and should be eased into only after the basics have been learned.
To that end, we’d be remiss in our discussion if we didn’t talk about how this is done. There are different methods to lifecasting, so for now we’ll touch on one of the easier ones to try first. In your local craft store, you’ll find the sculpting and modelling section. There you can find modeling gel. Detailed instructions are on the packaging, but essentially you’re going to create a quick setting liquid that will form a firm gel when it’s ready. If you placed your hands inside a bucket of this liquid as it hardened and remained very still, you would be able to remove your hands to reveal a negative mold of the anatomy. The biggest issues to avoid at this stage are moving around too much (which will destroy the impression) and creating undercuts (where the hollow space bends back up upon itself creating inevitable air pockets in the cast and may even prevent extraction from the mold without destroying it). Making fists is okay, as is keeping your fingers mostly straight, but curling your fingers under will cause the cast to fail as the fill material will not be able to reach and settle in all areas evenly.
Since this mold is disposable, we can proceed to pour a plaster mix into the cavity. Pour a little bit at first and roll it around to make sure all sides are covered. Proceed to fill up the rest of the impression being sure to tilt the mold to free tight areas of air pockets. Once the mold is full of plaster set it aside to dry. Be aware that the temperature of the water you use plays a big role in how many of these products react. A few degrees difference can mean the difference between a mold taking too long and one that sets up too fast to be usable. When the plaster has at last hardened and cooled, remove the gel and touch up any imperfections in the cast. You now have an essentially accurate sculpt of your hands.
To create your prosthetic, apply plasticine (non-air drying) clay to the sculpture. You can now sculpt shapes that will perfectly conform to your hands. Once your creation has been designed make another impression of the outside of the clay using the same plaster casting method described above. You’ll have to build in dividers using thin tin flashing playing cards, or whatever works so you can separate your mold, otherwise you’ll have to break the plaster to get your prosthetic out. When hardened, separate the molds and clean out the clay. Paint in your separating agent with a brush being sure to get all the nooks edges and corners. Reassemble the two molds together and pour latex, foam or silicone into the cavity where the clay used to be. If you make the mold strong enough and separate carefully you should get more than a few uses out of the same cast.
Creating, applying, and concealing prosthetics is an art form that will take quite a long time to develop and refine, but don’t be afraid to try it. Getting started is easier than you think and most materials are as close as your nearest hobby shop, craft store and home improvement outlet. Overall success will depend on your knowledge of the materials, your creativity, and your ability to remember the golden rule of special effects: they look best when they don’t call attention to themselves, rather they fit seamlessly into your creation as a whole. You can develop the skills to create the character you envision in every way. Don’t be afraid to take the necessary first step. Experiment, create, amaze, enjoy!
Sidebar
Special considerations
Now that we’ve whet your appetite we’d hate to scare you off, but like those annoying pharmaceutical commercials, we’d be remiss if we didn’t at least mention the potential complications involved with prosthetics and special effects makeup. These rarely pop up, but they do from time to time. You should always be conscious of safety considerations, and be prepared to take precautions against any issues that may come to pass.
People can be allergic to the chemicals and compounds used in special effects makeup and prosthetics. Test for reactions on small areas before doing any application. Take steps to avoid large amounts of hair being pulled out and keep chemicals like spirit gum out of the eyes at all costs. Some people find prosthetics itchy and uncomfortable or even claustrophobic. They may make skin feel dry and sensitive for a few days after removal. Makeup and compounds can stain and be hard to remove. Strong scrubbing will likely be needed. Read instructions carefully and be aware of potential increased risk of flammability. Always be aware of your subject’s safety, especially when cutting, applying and painting appliances. Don’t forget that some applications may lead to impaired mobility or restricted line of sight, so your subject may have a hard time getting around obstacles.
Lighter considerations such as wasting time and money on an unsuccessful mold, or the incredible mess that casting can create are less severe, but more prevalent. There is a moderate initial investment that is required as well, and you’ll probably have a good deal of waste at the end. Reusability of anything is not guaranteed and some steps just cannot be rushed. Practice not only makes perfect, but it will help you avoid or overcome all of these issues and result in safe, efficient and awe inspiring makeups.
Sidebar
Considering usage
Prosthetics must work well with the situation at hand. If you’re just making a Halloween costume, you can get away with a bit more than you can if you’re creating a creature for a movie. There are many considerations when designing a makeup application. Will the makeup be seen close up or from far away? Will the talent be required to “act” through the makeup and to what extent? What will the lighting and costuming look like? Will the genre be silly or serious? If the appliance is required over many days can you recreate it with speed and accuracy? What will the lighting be like? Will your creation hold up to action or getting wet?
Perhaps you can get away with a rubber mask instead of a full prosthetic appliance, makeup instead of a mask or a costume to suggest a creature instead of building one. Knowing how you are going to present your creation to the world will help you make smart decisions in designing and fabricating your prosthetics. Finally, remember to take photographs of your finished product for consistency should you ever need to recreate it, or for inspiration on your next makeup.
Peter Zunitch is an award-winning video editor based in New York


