
In a nutshell
- This article covers how to create slow-motion video out of normal frame-rate footage using Twixtor
- Creating slow-motion video from normal frame rate clips is challenging because it requires editing software to generate new filler frames
- Though still not perfect, Twixtor promises fewer artifacts in these filler frames thanks to its proprietary pixel tracking tech
Twixtor is a video effects plug-in from RE: Vision Effects. It’s primarily used to create slow and fast motion video from normal frame rate footage. The Twixtor plug-in is compatible with a wide range of post-production software. That includes Adobe Premiere Pro, After Effects, Final Cut Pro and DaVinci Resolve, plus a bunch more. The regular license is currently priced at $330, with a Pro version available for $595. You can learn more at revisionfx.com. It’s a bit pricey, but it may be worth considering for professionals who will use it often.
Why use a slow-motion plug-in?
Usually, to get smooth slow-motion footage, you need to shoot at a higher frame rate in-camera. Most often, videographers will shoot at 60 or 120 frames per second when they know they want to include slow motion in their project. This high frame rate footage is then played back at either 24 or 30 fps, depending on the production. Capturing more frames and then playing them back at a slower rate is an effective way to create a cinematic slow-motion effect.
But what if your camera doesn’t shoot those higher frame rates? Or maybe you weren’t planning to use slow motion until you saw a fantastic opportunity to add drama while editing. It could also be that you have a 12-second gap and only 9 seconds of usable footage. Whatever the reason, Twixtor allows you to create smooth slow-motion footage from ordinary video.
How does Twixtor work?
When you use your editing software to slow down normal frame rate footage, it has to make up for the missing frames somehow. To do this, it guesses what those missing frames would have looked like based on surrounding frames.
Twixtor claims to be particularly good at this interpolation process. The plug-in uses proprietary technology that tracks the motion of each pixel. They claim this results in more accurate filler frames with fewer weird digital artifacts.
What else can Twixtor do?
In addition to retiming footage on a percentage or frame-by-frame basis, Twixtor offers several other features, like retiming 360 video and converting footage between different frame rates. The plug-in can also be used to add motion blur and enhance dark imagery.
If you opt for the Pro version, you’ll have access to more complex effects like object separation, RGB+A tracking and motion vector support.
How to create slow-motion video using Twixtor
Now that we know what Twixtor is, let’s take a look at how to use it. Specifically, we’ll break down how to slow down footage in Twixtor, step by step.
Step 1: Install Twixtor
You’ll obviously need to have Twixtor installed on your computer to use it. To get Twixtor, head over to revisionfx.com and download the appropriate files for your editing software and system. Follow the instruction provided to install the plug-in.
Note that this tutorial was created using Adobe Premiere Pro, but the basic principles should apply, regardless of your base program.
Step 2: Make a new sequence for your slow-motion clip
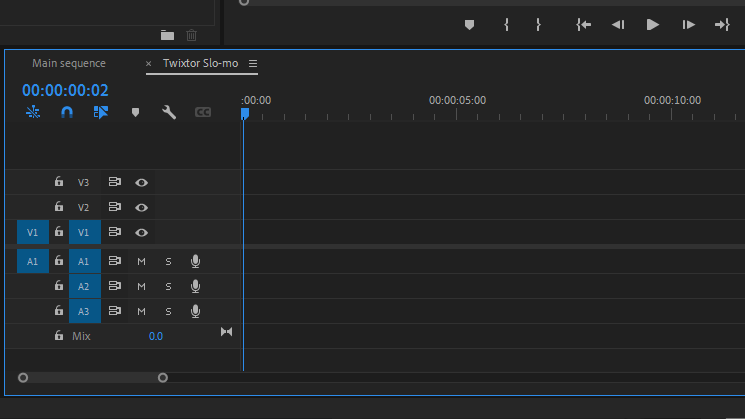
Once you have Twixtor installed, load up your supported editing software and open a new or existing editing project. Create a new sequence named Twixtor Slo-mo — or similar.
Step 3: Add your footage
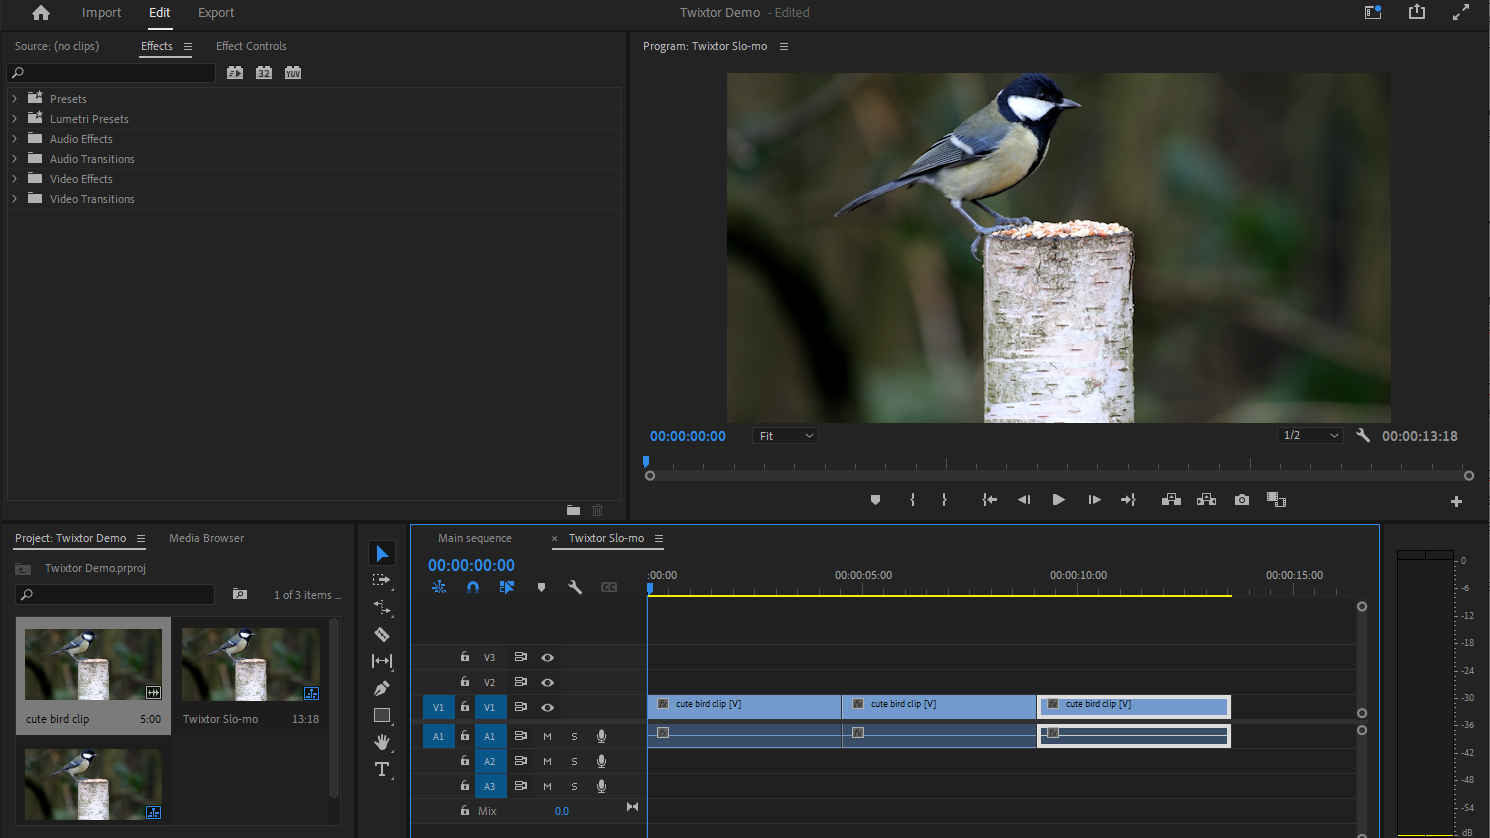
Next, add the clip you wish to slow down to the newly created sequence. Copy and paste the same clip into your Twixtor Slo-mo sequence two or three times. This extends your slow-motion sequence, so nothing gets chopped off once you slow down your footage.
Let me explain: As a plug-in, Twixtor doesn’t have permission to alter the length of clips in the timeline. To get around this, we use a separate sequence to extend the length of the clip before adding the slow-motion effect.
Step 4: Add the Twixtor Slo-mo sequence to your main timeline
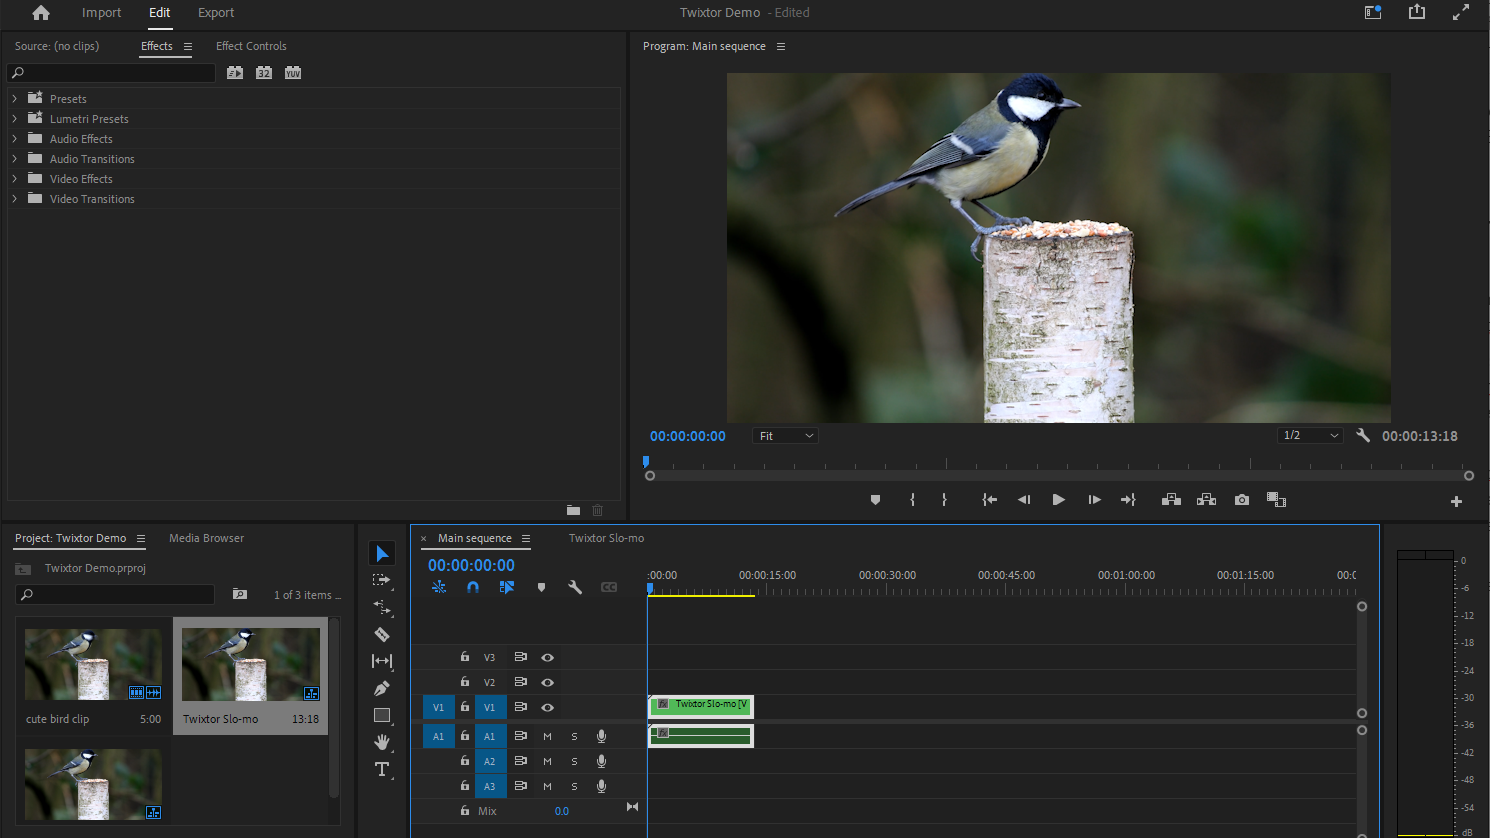
Drag and drop your newly created Twixtor Slo-mo sequence with your extended clip into your main project timeline. For this demo, we labeled ours Main sequence.
Step 5: Apply Twixtor to your footage
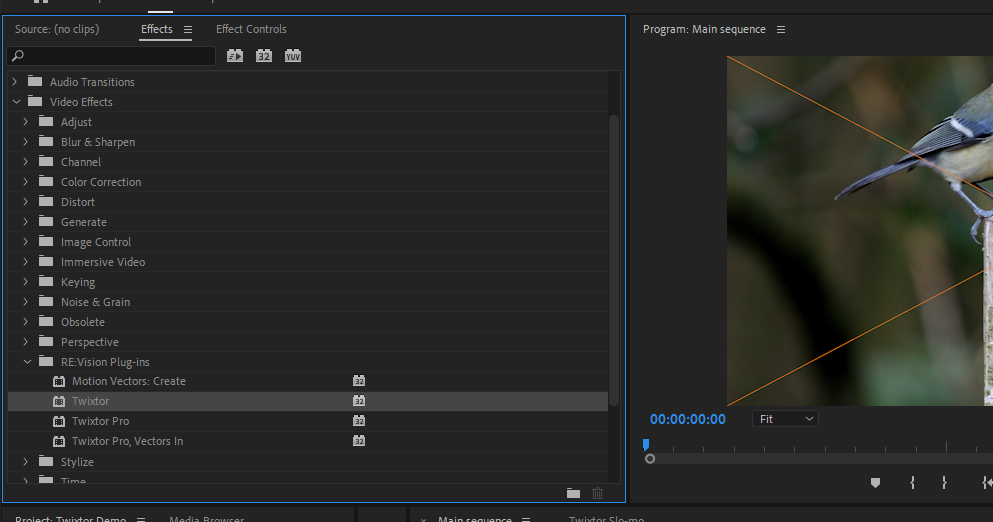
While working in your main sequence, select the nested Twixtor Slo-mo sequence and apply the Twixtor effect. It will be under Video Effects > RE: Vision Plug-ins. You can also type ‘Twixtor’ into the Effects search bar.
Step 6: Open the Effects Controls panel
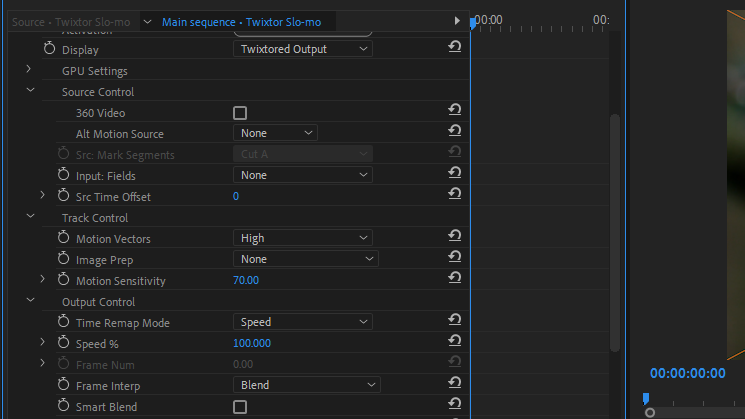
Head over to Effects Controls to adjust Twixtor’s settings. You can keep most of these settings at their default value except in specific scenarios. However, there are a couple of settings to double-check. Display should be set to Twixtored Output to properly display the effect. Also, Input: Fields should be set to None for progressive footage.
Step 7: Slow down your clip using Twixtor
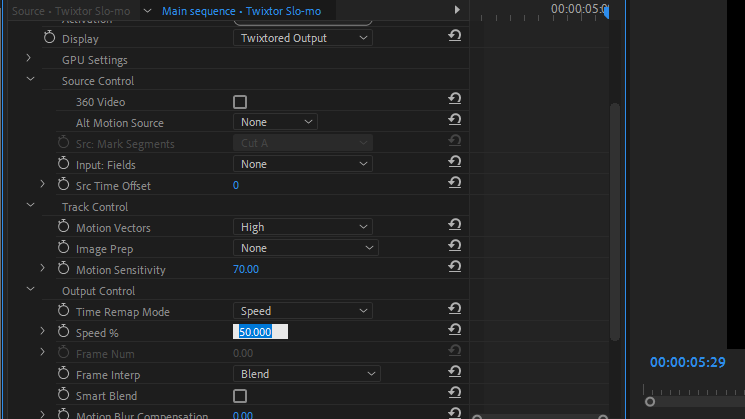
In the Twixtor settings panel, under output control, Look for the setting called Time Remap Mode. For this tutorial, we’ll be setting this mode to Speed. Just below that is the Speed % field. This controls the playback speed of your footage.
In this case, we want to play back our footage at 50 percent or half-speed. That means I need to set the Speed % value to 50. If we wanted the clip to play back at quarter-speed, we would set the value to 25 and so on. Choose the playback speed that works best for your specific clip.
Step 8: Render your slow-motion clip

Twixtor doesn’t render in real time, so you’ll need to render the clip manually to see the full effects. To do this, select the Twixtor Slo-mo nested sequence, then go to Sequence > Render selection.
Step 9: Trim your clip as needed
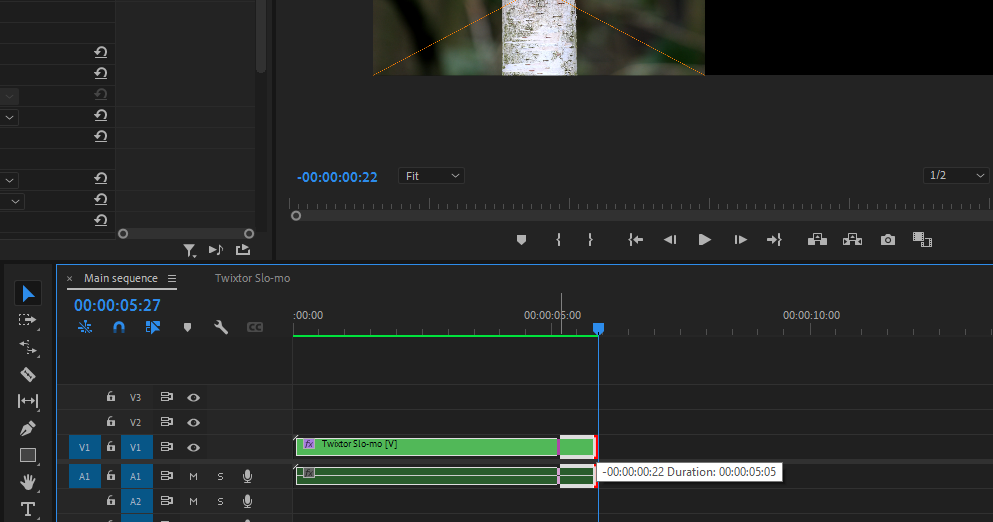
If you notice your clip starts to repeat near the end, simply trim the nested sequence down as needed.
The results
From there, you can tweak your setting according to your footage and needs. Try different playback speeds and experiment with different quality settings. Also, note that some clips will be easier to slow down than others, so subject matter and type of movement will impact your end results.
Is Twixtor worth it?
Overall, Twixtor is a useful tool for professionals who need more options when it comes to retiming footage. It shines when tackling more complex tasks like keyframed-based speed ramping but can also be useful in producing fluid slow-motion footage in a pinch.
Of course, the best option will always be shooting in higher frame rates to begin with, but when that isn’t possible, Twixtor is a solid alternative.


