
In a nutshell
- The L cut is an edit where the audio of a previous scene carries over into the next scene
- These types of cuts are effective for flashbacks, to show character reactions and montages
- You can create an L cut by unlinking a clip’s audio and dragging it under another clip
When first learning to edit video, most video editors will use simple cuts. At each edit point, both the video and audio tracks are cut at the same time. Each clip will therefore have its own audio in sync and be added to the editing timeline in sequence. Often, the use of simple cuts is sufficient.
However, you can also make use of a clip’s audio in more creative ways by cutting it in at a different point to the video track. One way to do this is to use an L cut.
What is an L cut?
An L cut is an edit when the audio from the preceding scene or clip runs under the video of the following scene or clip. It’s called an L cut because of how the edit looks when viewed on the timeline inside a video editing program.
The outline makes the shape of a capital letter L.

With this type of cut, the sound from one scene will continue even as the new scene is on screen. The opposite of the this cut is — you guessed it — the J cut. Sound from the second clip begins before the edit, while the first clip is still onscreen.
How to perform an L cut
By default, most video editing programs lock the video and audio tracks for a single clip together. This is to ensure that the audio stays in sync with the video as you move a clip around on the timeline. However, it also means that when you cut the video track, the audio track is also cut.
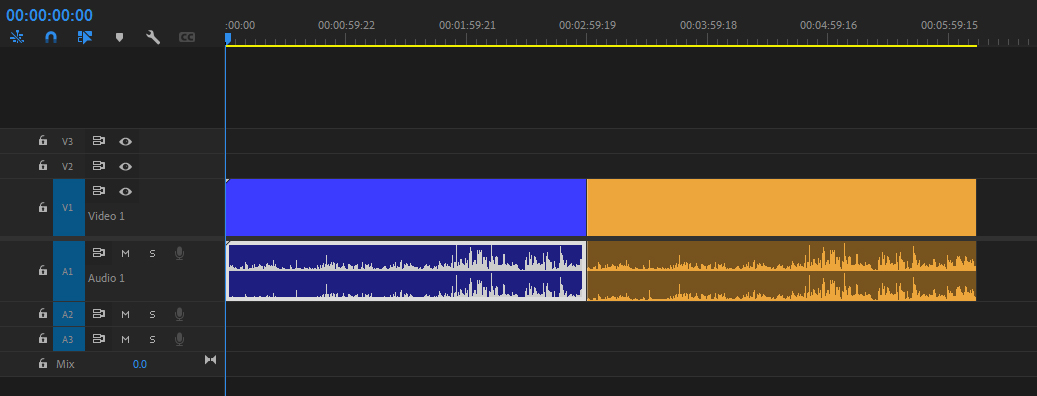
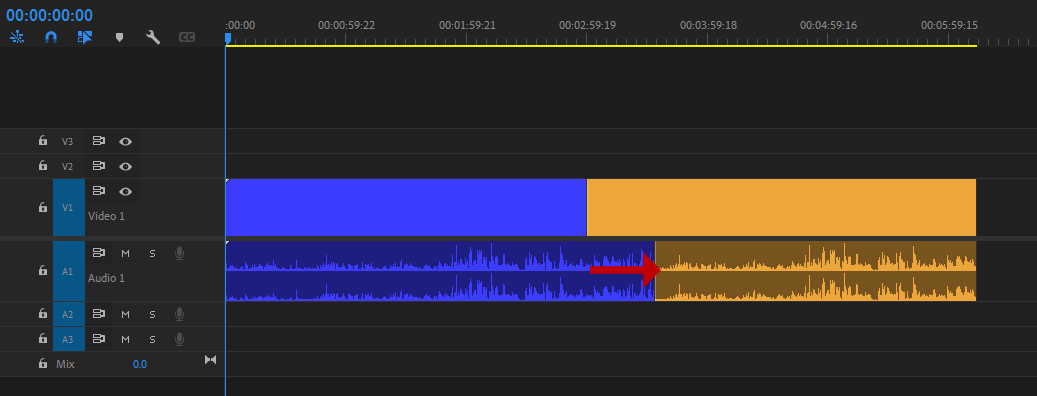
To perform this type of cut, you first need to unlink the video and audio tracks at the edit point. Then, to make your L cut, extend the audio track from clip one under clip two. You should then relink the audio and video tracks for the clips. This will ensure that you don’t lose sync later if you move either of the tracks.
How can you use an L cut?
Transitions
Because the audio and video change at different times, you can use L cuts to create natural, flowing transitions between scenes. Continuing the audio from the outgoing scene under the new scene creates a link between the two, which helps soften the impact of a hard cut between clips for the audience. This is because the continuing audio carries them seamlessly through the change in image.
Dialogue
When editing a conversation, it might seem easiest to cut between the participants as they speak. However, this can create a detached, stilted feeling to the conversation. You’re also missing many opportunities to show the characters’ reactions if you’re only focusing on the person speaking.
For example, you can use an L cut to cut away from a shot of a lawyer reading a will while keeping the audio of their voice playing. Then cut to a shot of a hopeful relative, showing their fading smile as they learn they won’t be getting any money. Showing how your characters are affected by what’s being said will engage your audience emotionally, and one of the best ways to do this is to use an L cut.
Comedy or drama
An L cut can also be used to create comedy or drama. For example, your protagonist may finally declare their undying love to another character, creating a moment of tension. However, while they speak, you could use an L cut to show that the other person has fallen asleep as a comedic reveal.
Alternatively, this technique could lend a seemingly innocuous piece of dialogue from one character an unexpected sense of menace. Imagine how the audience would feel if you used an L cut to reveal that the person to whom they are speaking is tied to a chair, kidnapped by the speaker.
Flashbacks
L cuts are often used to introduce a flashback in a film as well. A character will start to reminisce about a past event. Even after the flashback sequence begins, however, the character will still be heard telling the story, now becoming the narrator. This type of cut will make the transition from present day to a flashback flow more smoothly.
Thoughts
In a similar way to a flashback, you can use an L cut to help illustrate a character’s thoughts. The character’s voice continues to be the audio as you use video to illustrate what they’re thinking. This technique can also be used for humorous effect by juxtaposing images that don’t match the dialogue. For example, a character tells the host how much they’re enjoying their party — but over their dialogue, you cut to a shot of the character asleep. The technique also works in a drama, revealing, for instance, that a character is dishonest or has ill intent.
Montage
L cuts are frequently used with montage sequences. You will often see this type of L cut used for montages at the end of a film or TV show. A character delivers a monologue summing up the events that transpired. An L cut then leads into a montage of shots to help tie up all the loose ends and bring the story to a conclusion.
Classic L cuts in cinema
To learn more about L cuts, there are many examples in mainstream cinema to study. All of these films feature L cuts throughout their run time. Here are a few specific examples to get you started:
“Dunkirk” (2017)
Director Christopher Nolan often ends his films with a montage, and “Dunkirk” is no exception. The film’s protagonist, Tommy Jensen, reads Winston Churchill’s famous “We Shall Fight on the Beaches” speech from a newspaper while sitting on a train. However, as he continues to read, Nolan uses an L cut to move into a montage sequence, tying up the storylines of other characters in the film. The speech becomes a powerful narration over that montage.


Image courtesy: Warner Bros. Pictures
“Big Fish” (2003)
Tim Burton’s “Big Fish” is about a man whose father likes to tell exaggerated stories about his life. As the father begins to tell each story, an L cut is used to transition into the flashback sequence. This means that the father becomes the narrator of the stories. “Big Fish” is all about storytelling, so the technique is perfectly suited to the nature of the movie.
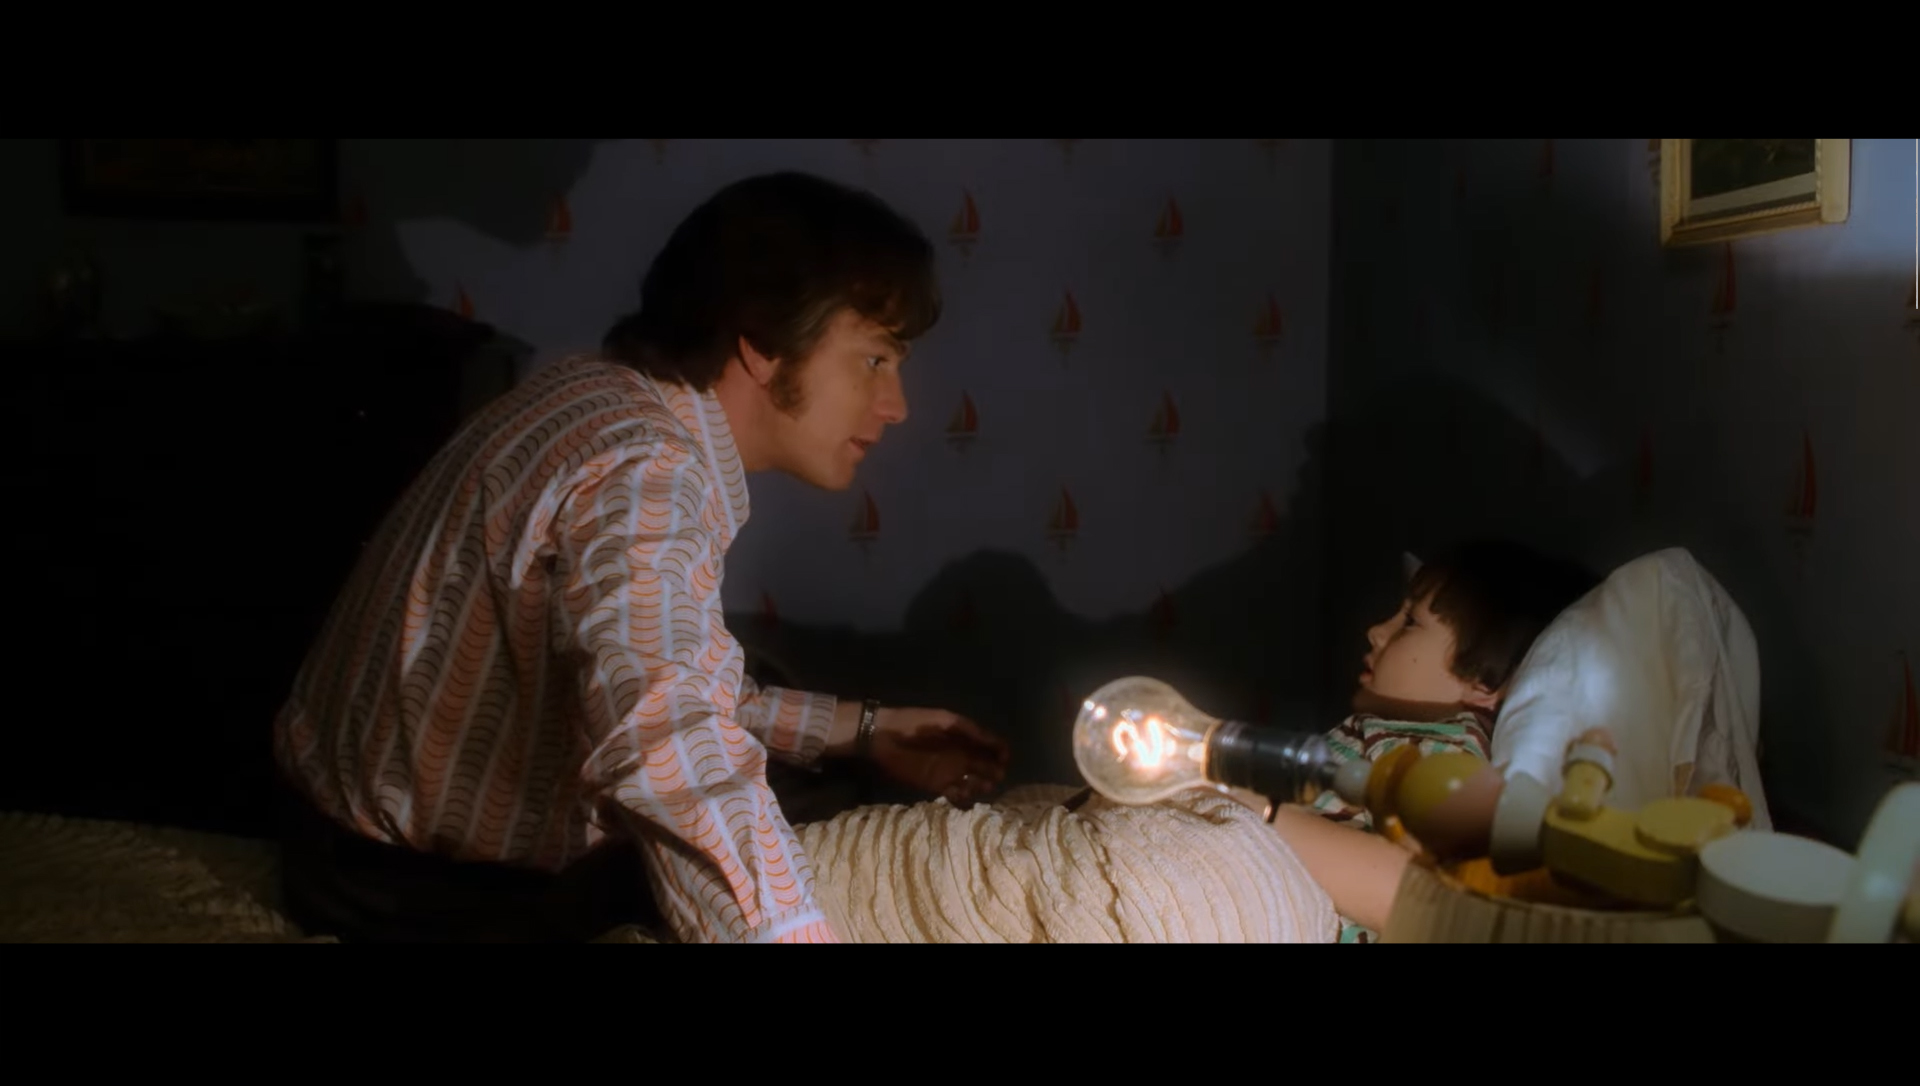
Image courtesy: Sony Pictures Releasing
“The Godfather” (1972)
Toward the end of “The Godfather,” there is a scene in which the main protagonist, Michael Corleone, is baptized. Director Francis Ford Coppola juxtaposes this serene scene with a montage of Michael’s henchmen assassinating all of his rivals. Toward the end of the sequence, the camera focuses on Michael as the priest delivers the baptism. However, while the priest’s words continue on the audio, Coppola uses an L cut to show the recently killed mobsters. It’s a chilling moment that perfectly illustrates Michael’s thoughts.
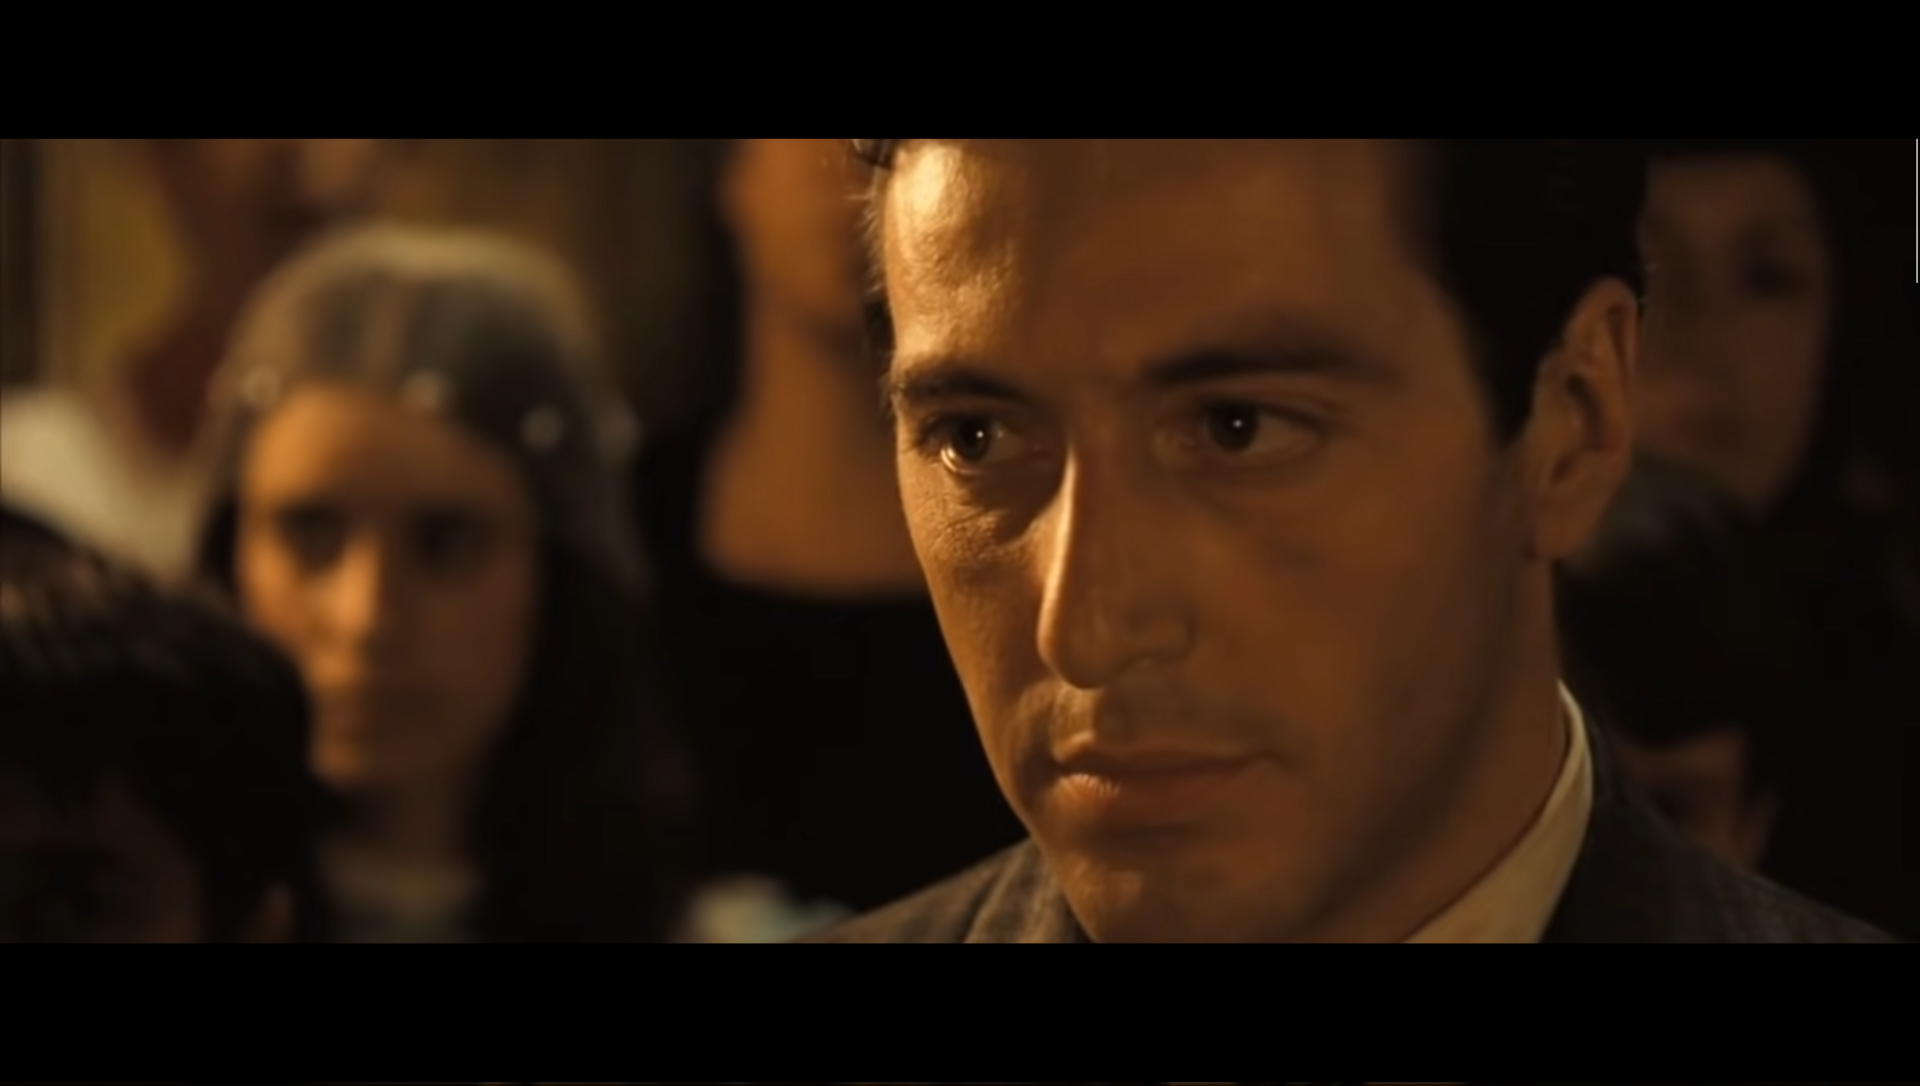
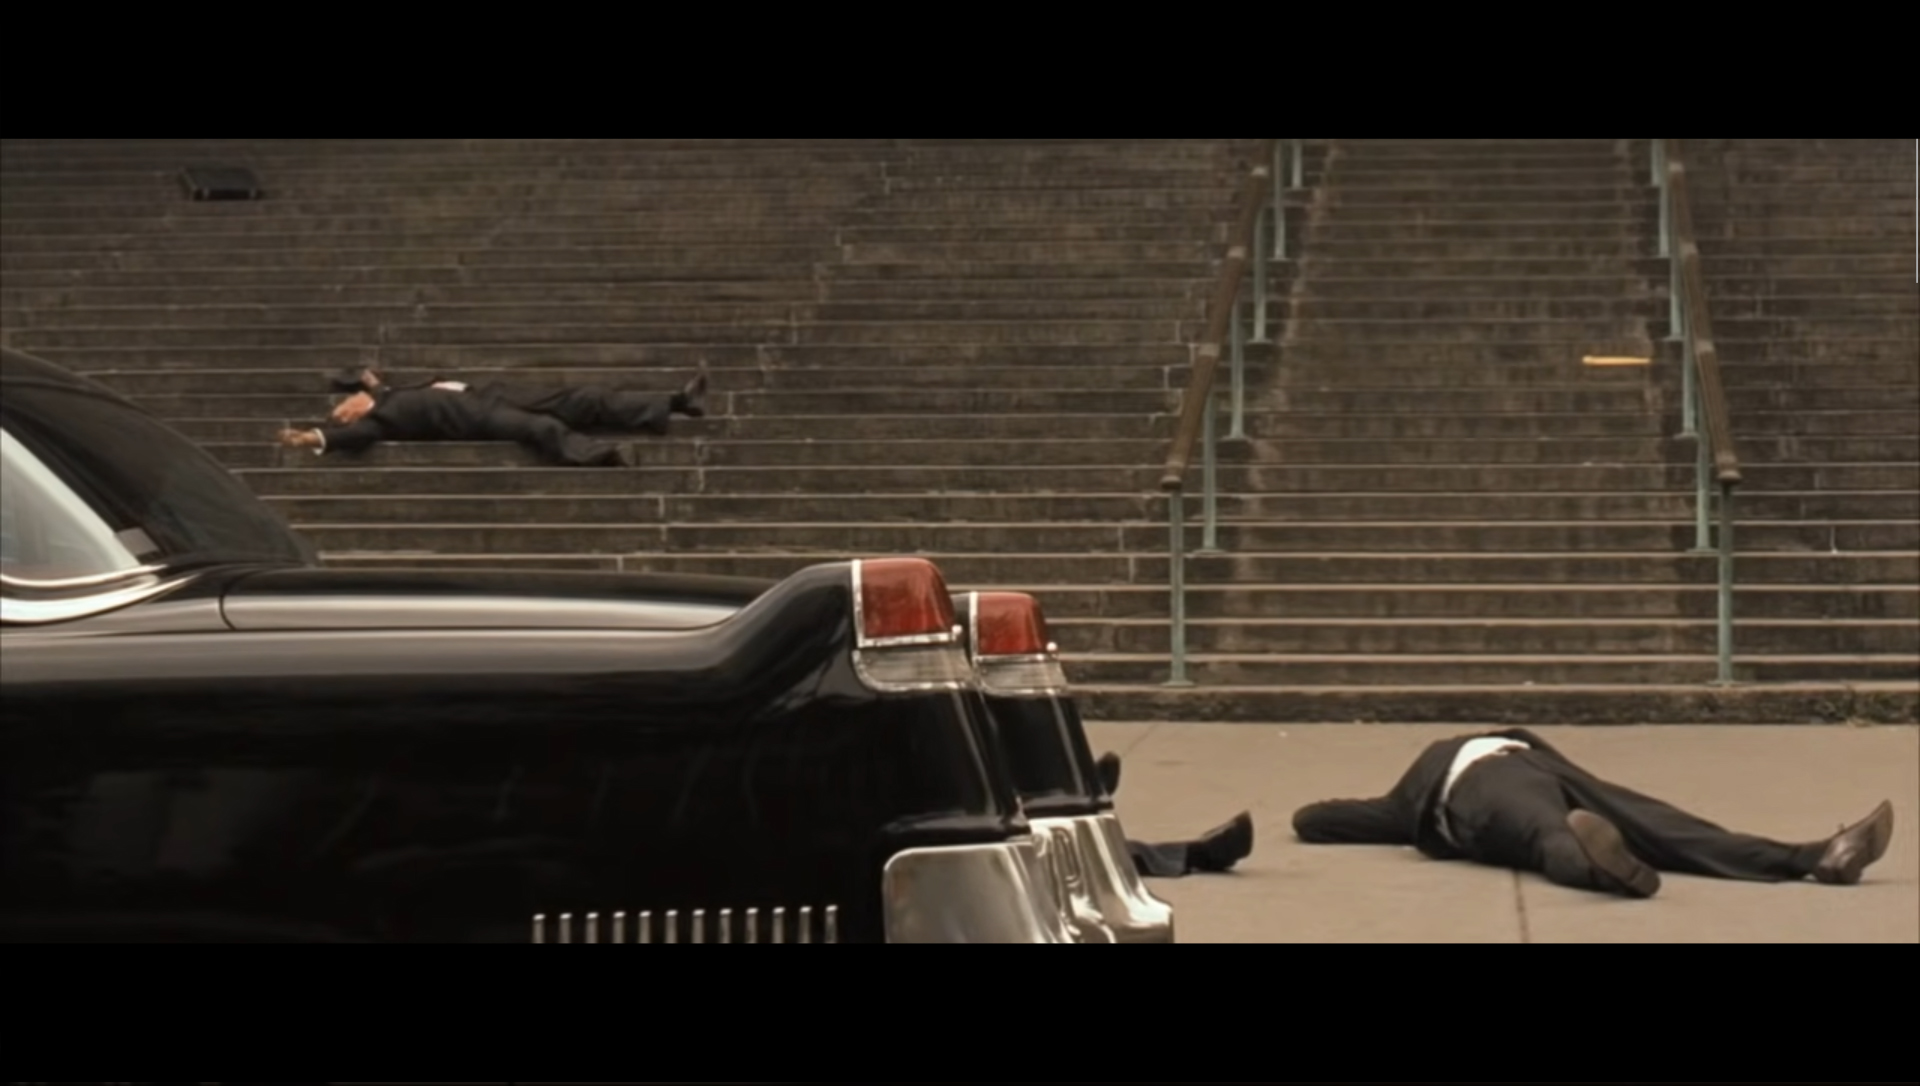
Image courtesy: Paramount Pictures
“No Country for Old Men” (2007)
With “No Country for Old Men,” the Coen Brothers showed how perfectly an L cut could work as a transition to end a movie. Sheriff Bell, played by Tommy Lee Jones, tells his wife about two dreams that he had — then pauses. The only sounds that can be heard are the room ambiance and the ticking of a clock. The film then ends with an abrupt cut to black. However, the room ambiance and the now ominous ticking of the clock continue. It’s a powerful way to make the audience realize that for Sheriff Bell, the story has not ended.
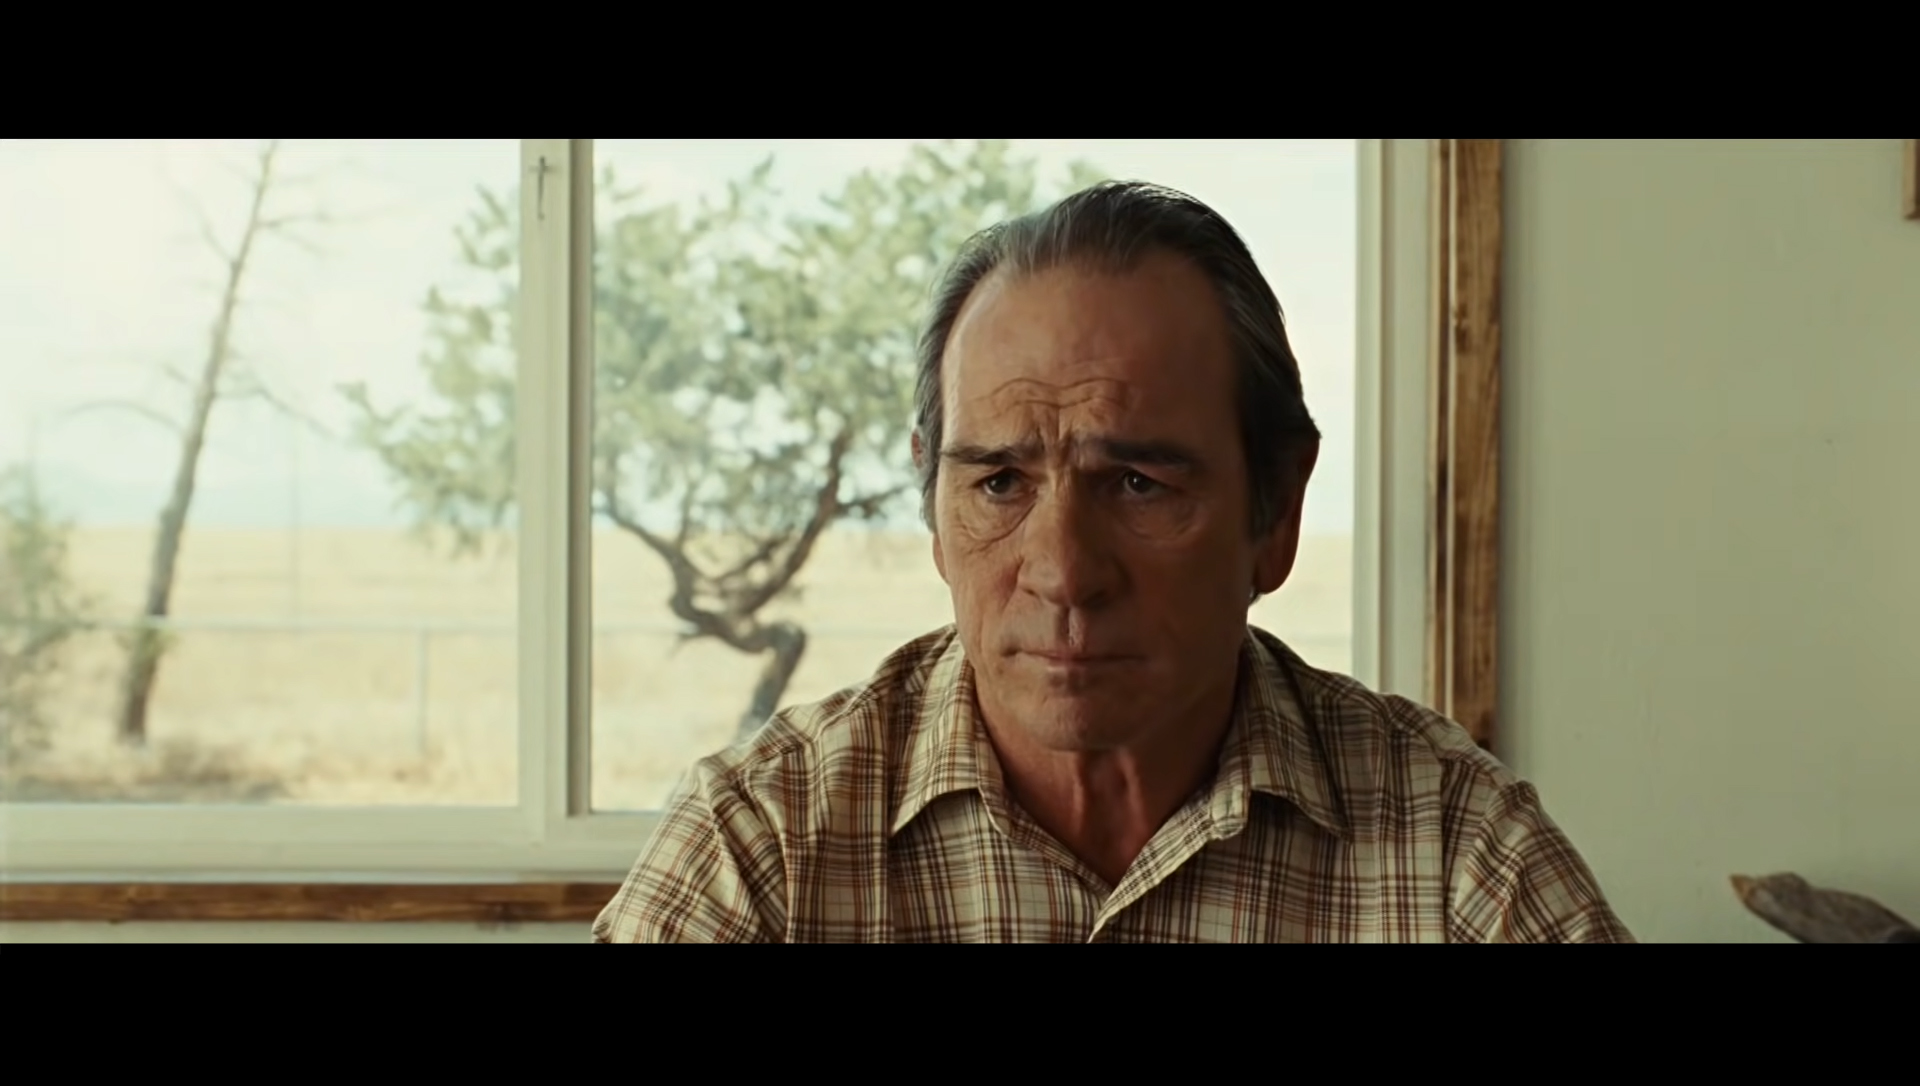
Image courtesy: Miramax Films
Time to apply
Now that you’ve learned about the L cut, it’s time to start using the technique in your own edits. The next time you’re editing a conversation, add some of these cuts to see how the dynamic of the scene changes. Rather than using a visual dissolve transition between scenes, use an L cut on the audio to see how it can soften a hard cut. You will soon see how effective these cuts can be.


