
Secondary color correction is the process of using mattes and masks to isolate individual regions and specific subjects within a video image to apply color correction. There are times when secondary color correction is used to subtly change the contrast in the shadowed portion of the background, and there are situations in which secondary color correction is utilized to completely change the color of an object that is the central element of a composition. Whether the desired effect is slight or extensive, the principles of secondary color correction remain the same. It’s a technique that, when utilized, gives the video editor extensive control in crafting their final image.
Uses of secondary color correction
There are many uses for secondary color correction; some are for technical purposes, others are for aesthetic choices, but any use of secondary color correction should be for the purpose of altering the video image to further its narrative impact.
Its a technique that gives the video editor extensive control in crafting their final image.
Video shoots that occur out in the field don’t always allow the videographer to have full control of the light in front of their camera. As a result, there are times when the recorded image will have an uneven exposure. Likewise, a videographer may end up having to shoot on a location with mixed light sources and end up with different color temperatures in the same shot. In either of these scenarios, the video editor can use secondary color correction to select and isolate these regions of the screen and adjust them to make the final image appear as a more consistent clip of video.
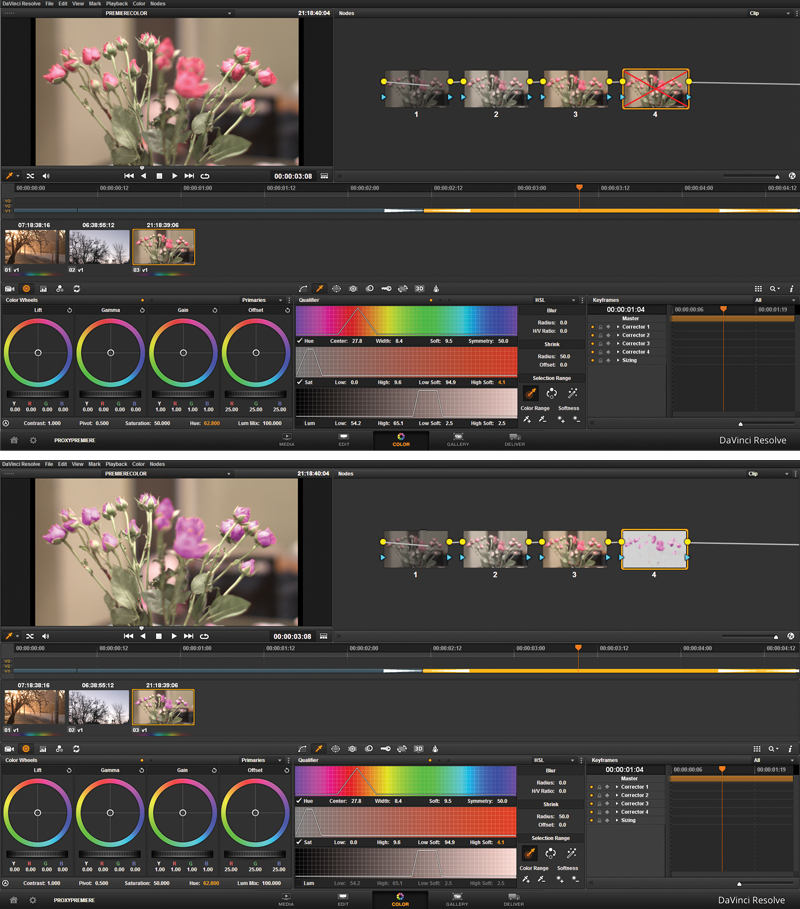
Secondary color correction is also used to alter the color of a specific object on screen, sometimes with a slight shift and other times completely changing the color to something at the opposite end of the spectrum. A blue shirt can easily be changed to a vibrant scarlet.
A third use of secondary color correction is to draw attention, to pull the audience’s eye to a particular spot on screen. This is often done by boosting the vibrance and saturation of the desired focal point while slightly lessening that of the outlying image.
How it’s done
Secondary color correction is most often performed after an initial, or primary, color correction is applied universally across the entire video image. The primary color correction serves the purpose of unifying the image and placing it within a technical standard for the video editor’s workflow. Levels are set with highlights and shadows stretching across the desired dynamic range. The overall hue is adjusted with white balance being corrected and the overall color tone of the video being set. Once the primary color correction is set, the editor performs secondary color corrections.
Masks
The easiest and most obvious way to perform secondary color correction is by using masks to isolate an object or region on screen.
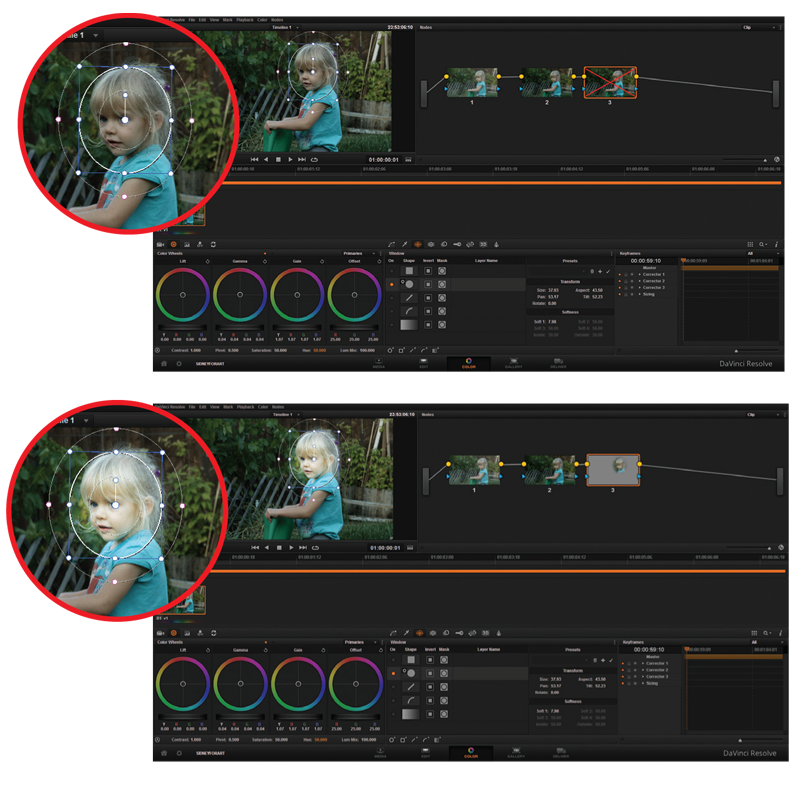
The simplest masks are shape masks, which remain stationary throughout the duration of a shot. A shape mask is most often a rectangle or an oval that is drawn by the editor while using a shape mask tool. The mask defines a region on the screen, but the editor retains the ability to determine how the mask is used. An editor can select whether the inside or outside of the mask is the region which is selected for effects. A mask set to “Add” will show the portions of an image inside of the mask, whereas a selection of “Subtract” will only show the areas outside of the mask. Masks can be layered and set to only utilize areas in which multiple masks intersect. In this way, complex shapes can be masked by using a series of overlapped simple masks.
It used to be that an editor would have to “double up” footage or use an adjustment layer for secondary color correction. The mask is applied to the top layer, which also receives the color correction effects. The applied effects only show up in the selection that’s determined by the mask. Many video editing programs, such as Adobe Premiere Pro, allow the video editor to apply masks to a layer, as well as effects, and then select whether the effect is applied to the entire layer or only the masked portions of the layer. This eliminates the need for duplicate layers and adjustment layers, although both techniques are valid and advantageous at times.
Tracking
Video editing programs are able to analyze footage and track objects as they move throughout a clip of video.
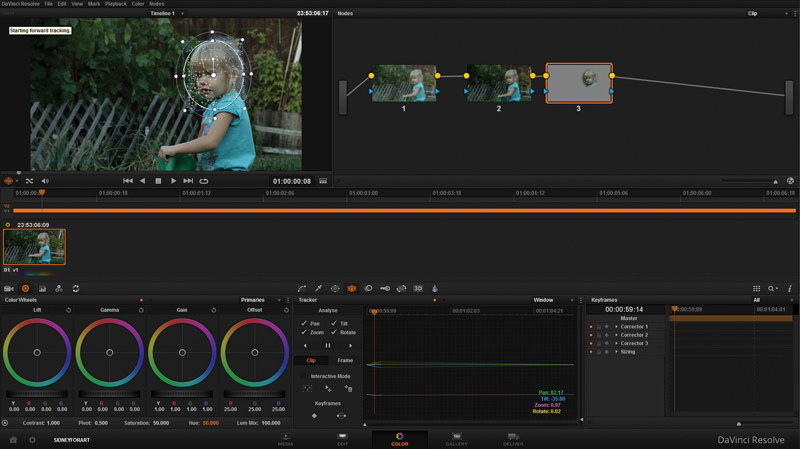
Video editors can use these tools to track an object and attach a mask to the tracked object. This is a technique that used to require a specialized skillset and specialized visual effects software. Editors can now perform a track with their video editing program. In Adobe Premiere Pro, a video editor can draw an oval mask around the object they wish to track. They can then go into the mask’s properties and set it to track. Premiere Pro analyzes the footage and updates the mask of each frame, keeping it positioned over the selected region as it moves across screen. This is an incredibly powerful tool for secondary color correction because once a mask is tracked, the video editor can apply specific color correction effects to the tracked mask and the secondary color correction stays with the moving selection. In this way, a video editor can quickly perform detailed secondary color corrections to moving objects without having to rotoscope any footage. This is a simple way to execute the trend of isolating a single colorized object on screen. If the mask is set to subtract, in other words only affect the outside of the mask selection, an editor could track a mask to an object and desaturate everything but the selected object. It’s a great technique for highlighting a product or person.
Color replacement
A popular method for secondary color correction is color replacement. Color replacement is similar to chroma keying, in which the video editor uses an effect to select a specific color or range of colors. Color replacement differs from chroma keying in that rather than producing an alpha channel from the selection, the color itself is shifted to another color. If color replacement is performed without using any masks, it will affect all objects in the video clip that fall within the selected color range. A video editor can generate masks to isolate an object, or region of the screen, to replace the color on a specific object in the scene without affecting other objects of the same color.
There are numerous creative choices available to the video editor when they understand and utilize secondary color correction. Most post-production software packages make it easy to do as a part of the routine post-production workflow. The power of secondary color corrections is that it can be used to make subtle but impactful changes to an image, or it can be used by the editor to drastically paint a new reality across the face of their footage.
Sidebar
Roundtripping for secondary color correction
It is easier to perform primary and secondary color correction right inside of a video editing program, the video editor never has to take a step out of their normal workflow to accomplish it. The truth is there are much more powerful tools for color correction than the ones found inside a video editing application.
Programs such as DaVinci Resolve and Adobe Speedgrade are built for the specific purpose and task of color correction. The tools inside of them allow for much greater control and flexibility when refining the look of video. The precision and depth of the looks created by color grading applications are difficult to duplicate using video editing apps. There is good news for the video editor, software developers are making it easier for projects to roundtrip from video editing programs into color grades for finishing.
Adobe has developed its platform over the past several years to give video editors a suite of applications for video post-production. A video editor working with Adobe Premiere Pro only has to save their project file and then open it in Adobe Speedgrade. Speedgrade recognizes all the media and has the edit laid out in its own timeline. While in Speedgrade, a video editor first performs primary color correction to ensure consistent exposure and color tone. A video editor can then apply preset looks or create their own and apply them to the footage. Then, the Speedgrade project can be saved and reopened in Premiere Pro. Upon opening the color-corrected project, the editor will find the effects from Speedgrade applied to their footage in Premiere Pro. The integration between the two programs allows the video editor to turn the Speedgrade effects on and off while in Premiere Pro. It just goes to show that nothing in the video is final until it’s released to the audience.
Chris “Ace” Gates is a four-time Emmy Award-winning writer and video producer.


