")
Chroma keying is the process of removing a color from the background of a video. Typically, chromakeying is for removing green screen backgrounds so you can replace the background with another video. There are a lot of great post-production software out there that have green screen keyers. While the process is similar in a lot of them, they each have some variations to their workflows. Let’s go over the process of chroma keying in three popular applications: Premiere Pro, DaVinci Resolve and Final Cut Pro.
Keying in Premiere Pro
Step one: place your clips into the timeline
To start, import your clips into Premiere Pro’s timeline. Make sure to place the green screen clip in the layer above the clip you want to swap into the background. When you key out the green of the clip, the layer behind the clip will show through.
Step two: keying out the green
It’s now time to start keying out the green from your top clip. Go to the Video Effects tab and select the pen tool. With the pen, draw a circle outline around your subject. The circle doesn’t need to be perfect. Think of this step like you’re cutting something out of a magazine for a collage. The end goal is to leave out any sections on the outer corners of the frame that may not be the same green hue as the center.
Once you’re finished with making the circle, head to the Effects panel and search for the Ultra Key effect. Drag the Ultra Key effect onto your clip in the timeline. It will then appear in the Video Effects tab. Under the Ultra Key, select the color picker and select a portion of the green screen near your subject.
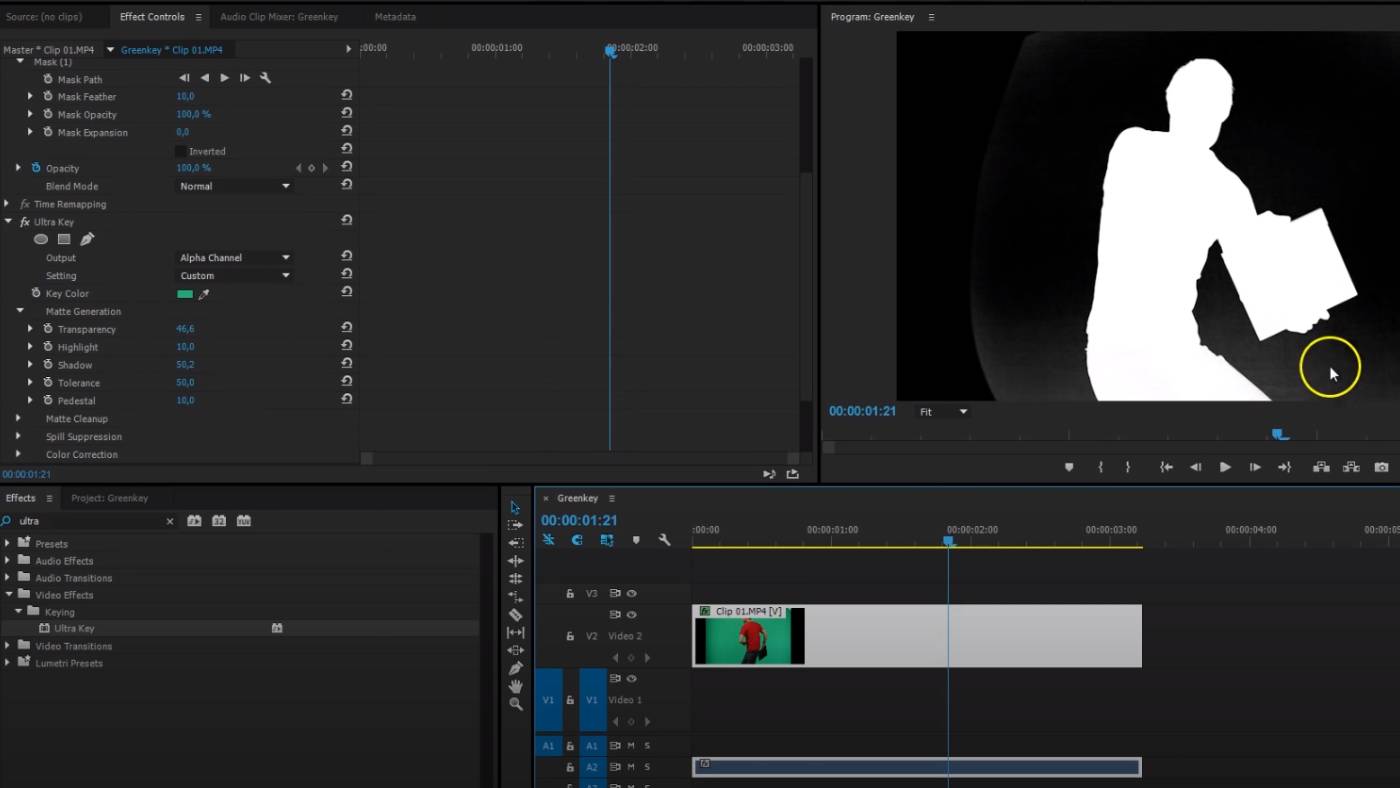
You can get a better view of what green hues are currently being keyed out by switching the Output mode to the Alpha channel. In the Alpha channel, the parts of your image that are white are the portions that will stay in the frame. The black parts are the areas that will be removed. It’s best to use the Alpha channel because you get a clearer picture of the hues left. If you still see parts left in your gram, head over to the Matte Generation tool. Here, you can adjust settings like the transparency, highlights and shadows of the Matte. You want to work with these settings until you get a clean white and black. Once you’re finished, you can see the final result by changing the channel back to the Composite channel.
Step three: clean it up
At this stage, you may still have some green edges you need to clean up. To remove the edges, adjust the settings in Spill Suppression. You can increase the desaturation to remove the green spill left on your subject. Just be careful not to overdo it on the desaturation. You can also adjust the Luma settings if you have some green hued motion blur.
Keying in DaVinci Resolve
Step one: set up your timeline
Place your two clips into DaVinci Resolve’s timeline. Be sure to keep the green screen clip above the video or image you want to insert into the background.
Step two: use the qualifier in the color tab
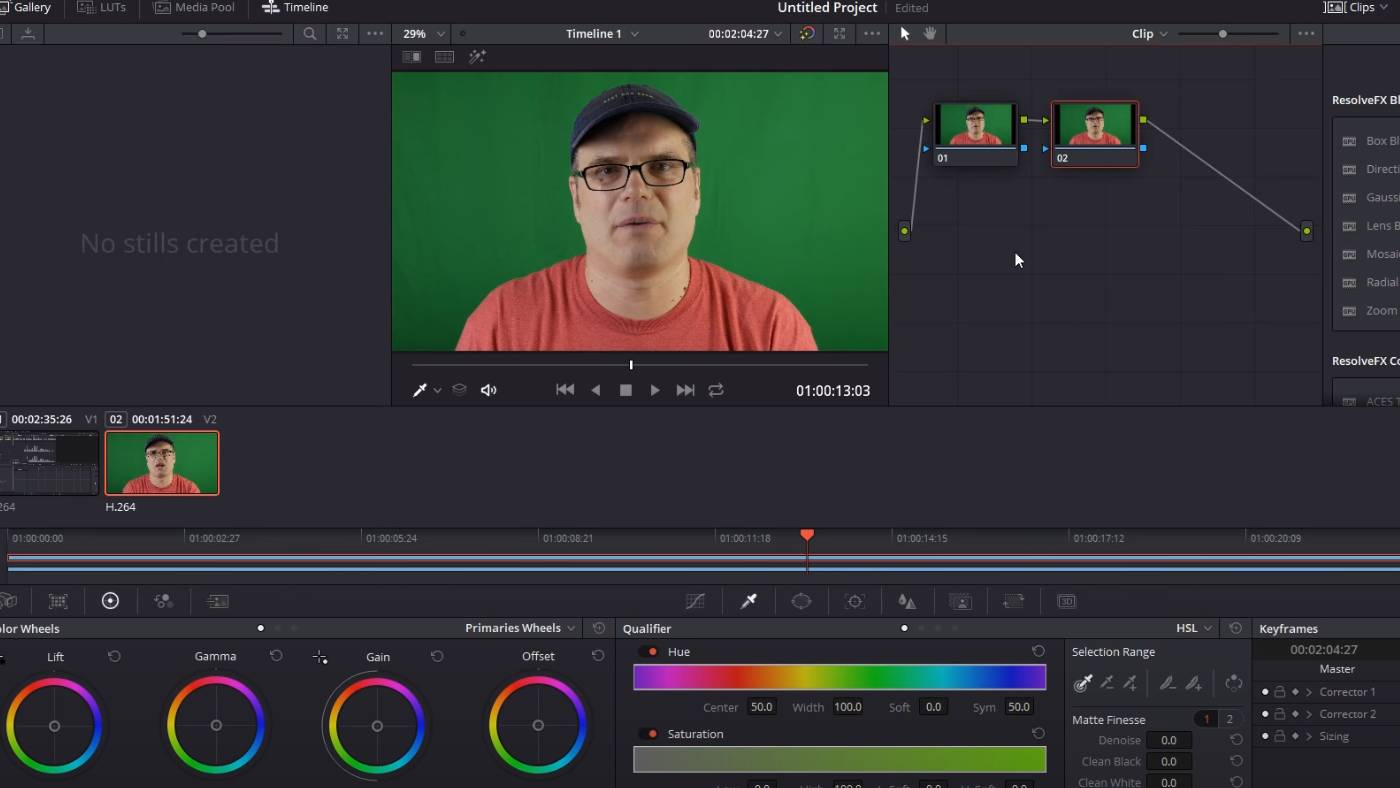
Go to the Color tab in DaVinci and create a new node. You can do this by either hitting Option and S, or you can go into the top toolbar, select Node and click Add Serial Node. You want to create a second node because this node allows you to make any adjustment you need to prior to keying out the green. For instance, you can adjust the clip’s saturation. Once you’re happy with your clip, select the color qualifier. The qualifier is an eyedropper tool that selects the exact color hue you want to remove. Pick the shade of green you want to remove from the scene.
After you’ve selected the shade you want to remove, you’ll see your selection represented in the node. If you want to see the Alpha channel of the key, you can select the Highlight Visualizer to see the Alpha composite. Just like in Premiere Pro, all black areas in the Alpha composite will be transparent, so if your subject is initially black and the background is mainly weight, you may want to invert your selection. You can do this by selecting the invert button (next to the Highlight Visualizer).
You want to make sure your subject is completely white and your background is completely black in the Alpha composite. If both are solid colors, you’ll have a clean key. To get both sections clear, make adjustments in the qualifier settings. . The first row of settings is the range of hues you want to remove from the scene. You can widen the range, increasing the range for green that you want to remove. Increase the range until the background is completely black. Be sure not to widen it too much to where it starts keying out yellows and blues. If you have a few spots that aren’t completely black, you can increase the luminance range (the third row) until you have a solid black in the Alpha composite.
Step 3: clean up your edges
If the edges of your subject are still jagged, you can go into the Alpha composite to fix this. You can smooth out the edges using the Blur Radius tool. Increase the blur radius until the edges smooth out. Just be careful not to add too much blur to the edges. It will make the final product look out of focus.
Step 4: Create an Alpha output
Right click in the space near your nodes and select “Add Alpha Output”. After creating the Alpha Output, click on the right grey arrow on the node you used the qualifier tool and drag the arrow to the new output you made. This is telling Resolve to send the effects in the node to the Alpha output.
Once you’ve connected the node to the Alpha Output, turn off the Highlight Visualizer and you’ll see the green has been removed.
Step 5: Clean up the image
You aren’t done yet. Zoom in and examine your subject’s edges. If they still have a green outline, lower the In/Out Ratio. It will remove the extra green pixels to create a smoother edge. Always examine your edges after every key, because it might look okay from afar, but much worse upon further inspection.
Keying in Final Cut Pro X
Step one: get your clips into your timeline
To start, get your clips into your timeline. You can drag and drop your clips from your library’s sidebar after you’ve imported them into Final Cut Pro X.
Step two: key out the green
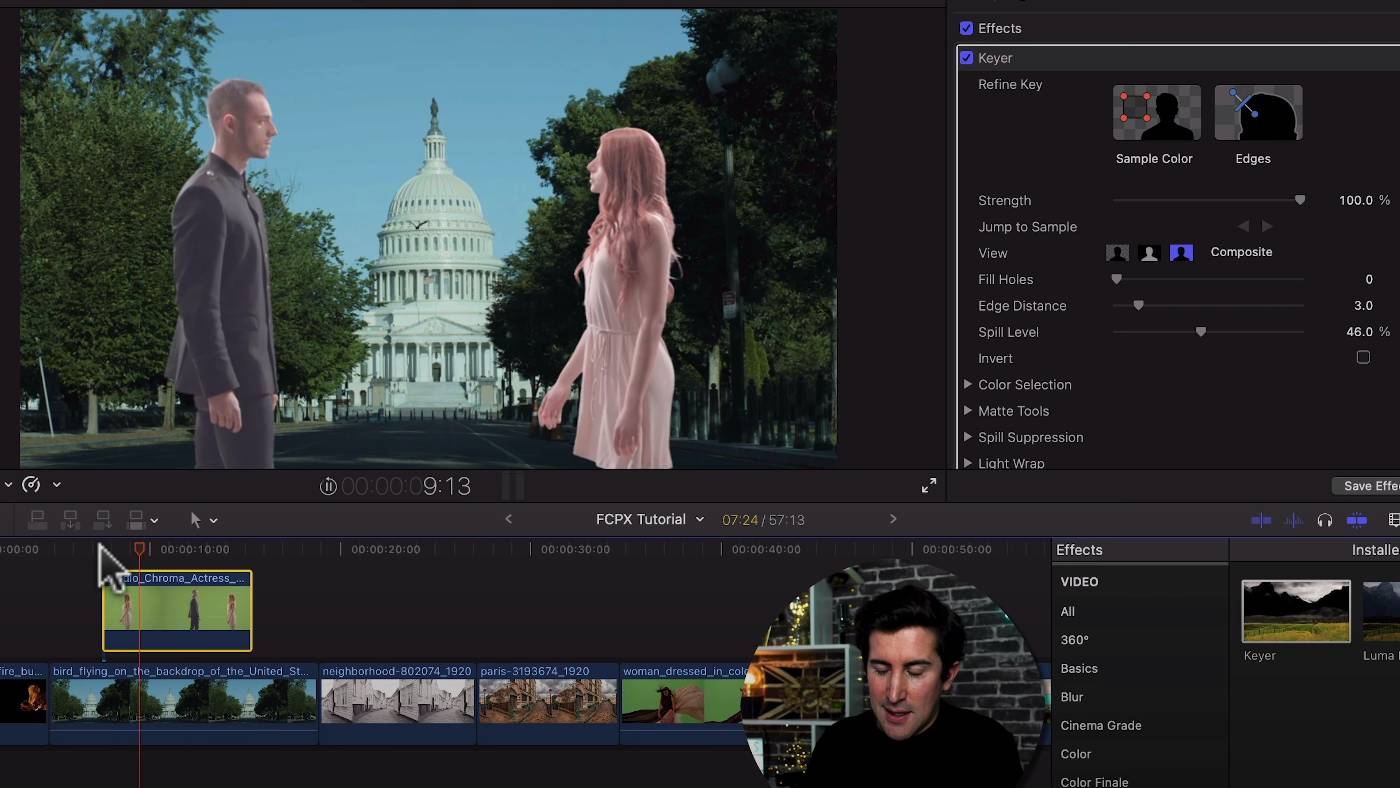
Go into the Effects tab and highlight the keying selection tab. Once you’ve highlighted the selection, drag and drop the Keyer effect onto your clip. If the key isn’t clean, you can adjust the keyer settings with the strength slider to adjust the intensity of the key. You can also use the Matte button to see the edges of your keying. The parts that are black will be removed from the frame. Use the Keyer effect sample color box to key out specific parts of green to remove them. You can also use the chrome wheel to ensure the edges are clean.
Overall, Final Cut Pro X has one of the simplest keying tools offered in post-production video editing software. So, it takes a lot less time and steps.
Preparation makes perfect
Every program is different, but the concepts are similar. A lot of effect goes into correctly lighting and setting up your green screen backgrounds on set so you don’t have to make a lot of fixes in post. If you want to learn how to light your green screen correctly, you can learn more here. At the end of the day, the key to chromakeying really is preparation and making sure you double-check the work you do.


