
In a nutshell
- Drone operation for commercial purposes requires a certified drone license, so start there
- Your choice of drone should depend on the space you’re flying in and the image quality you require
- Start slow because it takes time to master drone piloting, and practice, practice, practice
Aerial footage is something that has eluded modestly-budgeted productions since the concept first came along. Smaller cameras, inexpensive radio control technology and now the mass adoption of drones have brought the possibility of great aerial footage and drone photography within reach of practically any videographer. But cinematic shots are hard to get because shooting with a drone is not as easy as it looks. However, drone shots are an important part of cinematography, as they add special visual elements to help further tell a story.
So, you’ve got yourself a drone, expected great things, but what you end up with is what looks like home movies? Keep the following principles in mind, and soon enough you’ll have stunning, smooth and cinematic shots and be crowned a drone master.
Planning a shoot
Before you begin dabbling with flying drones and drone photography, be sure you’re certified. Flying a drone for commercial purposes can be done legally after becoming a certified drone pilot, thanks to the FAA Part 107 ruling in the Summer of 2016. Prior to this, a main concern of the FAA was with people flying drones near crowds, over highways, landing on oil barges and even near airports.
Take these factors into consideration and plan your shoot to be safe. Remember that these multi-rotor drones are essentially flying lawnmowers. Don’t fly over crowds, make sure everyone nearby is well aware of the dangers and keep non-essential personnel away from the shot. All it takes is one motor failure, a prop flying off or a guidance malfunction and you have a rogue blender flying around.
Don’t be afraid to cancel a shoot. The wind is not your friend. If it’s too windy out, delay the shoot. Even if your drone survives a high-wind environment, your footage may not be what you wanted. Your priorities are to make sure everyone is safe, your equipment survives and you get great, stable, cinematic footage… right?
Finally, talk with the person in charge in great detail, whether it’s a director or client. Make sure you know what they have in mind. Speak up and don’t be afraid to address your concerns for safety issues. If you’re the director, ask yourself those questions. Review the shots using something like Google Earth to get an idea of the flight environment. Check out the area if possible and map out all the trees, electrical wires and obstacles. Then, go practice! Make sure you’re familiar with all your drone’s capabilities and limitations. Practice typical camera moves and get familiar with your drone’s smart shots—these can come in handy and even save you time.
Equipment selection
To master drone photography and get those fantastic cinematic shots, you must use the appropriate equipment. You can’t shoot a large indoor shot with a giant drone, and you can’t expect good high-altitude footage with a mini drone, although a DJI Mavic is in sort of a sweet spot—it does both pretty well. When selecting your equipment, you should keep the following in mind:
The drone: There are pros and cons to every drone. The Mavic Mini is great for indoor shots. It’s lightweight and has prop guards to prevent damage to both the drone itself and any property it touches. The Mini can even come equipped with obstacle avoidance sensors to provide additional safety. However, the Mavic Mini lineup has a more limited range and does not hold up well in strong winds.

The DJI Mavic Air lineup is a cut above the Minis. They are incredible drones for a great price and can get both great indoor and outdoor shots. The lineup has introduced many new features to drones both cinematic and safety features. One of the new safety features is DJI AirSense, which alerts the drone pilot of nearby manned aircraft.
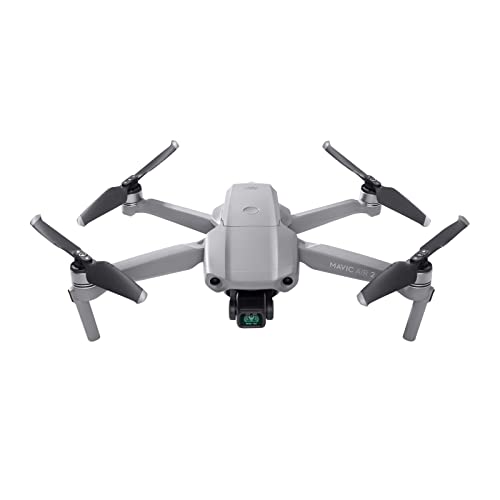
The Mavic Air drones are very capable, but they are not very impressive to show up to production with, and are still rather small and could be at the mercy of very strong gusts of wind. Check out our review of the Mavic Air 2.

The Mavic Pro / Zoom is a step up from the Mavic Air lineup and provides a bit more stability and professionalism. A step up from the Mavic Pro lineup is a step into the professional tier of drones, such as the Inspire series, which are bigger, faster and better than any of the previous models. Inspire has far superior filming capabilities, including up to three operators: pilot, gimbal operator and focus puller. There are also interchangeable cameras and lenses, as well as much higher-quality recording formats. A big multi-copter is amazing, but good luck in close quarters. Choose your drone wisely and if you are limited on how many drones you have, choose your shots to suit what you can work with. To see DJI’s current drone selection, check out their website.
The video camera
For your drone photography to look cinematic, you need the right video camera on your drone. Most drones these days are well equipped with capable integrated video camera systems. In fact, the main features you should consider when selecting which drone to use should be the video capabilities of the drone. Anything less than an Inspire means you’re pretty much stuck with the integrated camera system and its capabilities or limitations.
Perhaps you need to film your subject from further away, well the Mavic Zoom series incorporates a telephoto zoom lens allowing you to capture shots from much further away. Zooming in also increases the epicness of the parallax effect—creating an even more cinematic feel. Newer models of the Mavic series and higher-budget drones come equipped with powerful subject-tracking capabilities. This relieves some of the operational requirements from pilots which frees them up to focus on more of the cinematic aspects of their job.
Drones have come a long way in recent years, and one notable improvement has been to the gimbal systems. Nowadays, anything from a $450 Mini 2 all the way up to an Inspire can capture buttery smooth cinematic shots—in large part to the improvements in gimbal and stabilization technology. While some of the historical complications and concerns about choosing which video camera to use has been taken out of the equation, choosing the right drone—and therefore its incorporated camera system still remains an extremely important choice for your project(s).

Piloting
For the best drone photography, be smooth and slow. These are the words that need to constantly be moving through your head. Big dramatic and fast moves can end up with unusable footage, possible crashes and a nauseating viewing experience. Stay smooth and slow. At first, plan for only 3-5 second shots. A long shot coming from high above a city down to a front door is something that will make even the best pilots nervous. Keep your camera moving, keep it slow and make only minor adjustments.
Tiny movements on the sticks:
You have to stay very gentle on the sticks or your shot will be useless, no matter how good your gimbal is. Practice, practice, practice. In the days leading up to the shoot, spend some time going through some shot moves to make sure you aren’t rusty on the controls. Rehearsing some typical flight movements means you’ll be in command of your drone when the shot counts. By the time you get out to your shoot, you shouldn’t be standing around thinking, “hmm, what shall we do?”
Fly through the shot:
In cinematography, we call it handles. Your shot should start well before you think and end well after you think. Just like when shooting with a dolly, you don’t abruptly stop when you think your shot is done. You continue the move for a few more seconds. That’s exactly what you need to do with a drone. Any editor who has worked with drone photography footage will tell you that their biggest pet peeve is when they see the perfect drone shot and the pilot abruptly swerves away just before the editor wants to mark an out, only to leave the editor with no room to edit. It seems obvious, but it happens…a lot!
Shooting techniques
Drone photography and aerial footage both is and isn’t like a Steadicam, dolly or jib. With all the traditional movement systems, there is something holding you in place… the ground! However, the same shooting techniques apply. Tiny movements, lots of practice and stay very, very stable and slow. There’s an even better reason to stay slow besides just good footage. If you get your drone moving in some direction, there is no ground to slow it down nor stop—at least not in a pleasant way. Once it’s moving, it is you who can make it stop, swerve, avoid obstacles, etc. Slow will keep your aircraft in one piece. Thankfully, most modern drones now incorporate sophisticated obstacle avoidance sensors that step in to keep the drone from crashing should the pilot have a lapse in concentration.
If possible, don’t shoot into the sun. In fact, don’t shoot in even remotely the same direction. Your props could cast shadows on your lens and do very strange things to your video. Also, dust on your lens from the ground on takeoff otherwise, it will shine like stars if the sun hits it. So, clean your lens before every flight.
Fly-by
The fly-by is an essential shot to grab for practically every project. Good for a quick cutaway, transition or just another shot variety for a montage. Fly your drone over, through or to the side of the subject. While the drone is flying by, pan or tilt the camera to ensure your subject is framed properly to maintain the best composition. Don’t forget to leave good handles on the beginning and end of your shot for editing purposes.
Orbit
The classic orbit shot, a once notoriously very difficult shot requiring constant micro-adjustments to speed, angle, altitude, and the camera gimbal is now obtainable as an autonomous “quick-shot” on many drone models. Still, you’ll be able to have the most control over your shot for dynamic situations if you manually pilot the drone. In theory, rotate around your subject of interest in a complete circle at the desired altitude. Sounds easy enough… right? Try your next orbit shot manually to become a more capable pilot.
Follow
For this shot, as the title implies, you’ll be following a moving subject. The timing involved can be tricky to execute. Plan the shot with all those involved and start off with slower follow shots to build up confidence. As with most of these shot ideas, many drones offer an autonomous option for this shot—and they do work surprisingly well.
Super-dolly
This shot formerly known as a “super-dolly” has since been popularized and given a more modern term—Dronie. The dronie got its name from the popular photo-taking technique consisting of a self-taken photo—The Selfie. The Dronie shot fixates on the individual, group of individuals, or any type of subject and then flies up and away from the subject to reveal the surroundings.
Fly-Through
Although not the most difficult, these are the most dangerous. You must pilot your drone straight through a gap, or hole in an obstacle field. It’s rather easy to perform a fly-through shot with the right drone and some practice. A smaller drone with prop guards takes away much of the stress and any potential catastrophic ending. Keep it as slow as possible. Newton’s laws—an object in motion stays in motion—can be your enemy here.
High Pan
An essential shot for ground-based applications is the pan. The same idea can be done using a drone, only now the pan takes place high in the air. This shot is great for an establishing shot and showing off the surroundings. The best part of this shot is how easy it is! Simply fly up to your desired altitude and then start slowly panning the camera around. Make sure to grab both left to right, and right to left shot options, as well as leave handles on either side of the pan for the most flexibility while editing.
Pedestal
For the Pedestal shot, think about how you would prepare for a high pan. The first step is to fly up to an altitude. Simply hit record on your way up and you now have a pedestal shot. Take the pedestal shot one step further and make use of the gimbal by adding a tilt during your shot in order to maintain your subject in the frame.
Final thoughts
These days, drones and their autonomous capabilities have allowed even novice pilots to acquire what used to be extremely difficult drone photography shots to master. While many of these shots are now easily obtained through a drone’s plethora of automated quick-shots, it’s still a good idea to manually execute these shots as often as you can and only rely on a drone’s autonomous capabilities when you really need it. This will help to make you an all-around better and safer pilot.


